February 18, 2021
Pixel Art
Aseprite Introduction
Title:
An Aseprite Crash Course In 30 Minutes
By:
AdamCYounis
Description:
Intro to using Aesprite and some basic work flow tips.
Overview
This tutorial offered a great overview of the most used tools, as well as how to quickly and efficiently use them. They cover their workflow and how these tools fit into that to get you started using Aseprite effectively.
Timeline
This is where the layers are contained. This also holds the separate frames, which can help which creating and previewing animations.
View Timeline Shortcut: Tab
New Frame Shortcut: Alt + N
Their Workflow
- Blocking (Silhouette)
- Shading
- Coloring
- Detailing
Feature Options
- Pixel-perfect: Off
- Symmetry: Sometimes
- Pencil (Brush): Often round
- Pressure Sensitivity: Off
Shading
Blot several colors
Eyedropper Tool
Alt temporarily gives you the eyedropper tool while holding it. This lets you quickly use it to just grab one of the few colors you have already blotted on the canvas and use it to continue coloring as you start the initial shading phase. This is very strong for a quick early workflow since you tend to only use a couple colors, so this gives you access to those couple colors while switching between them easily very quickly.
Shading Mode
This let’s you select a small palette of colors and whenever you paint over a color included in that set, it will cover it with the next shifted color (either 1 up or 1 down depending on ordering selected). This can be tricky to use, but can help quickly modify some shading areas.
Their keyboard shortcut setup (Not default):
- B = Pencil (Brush)
- D (while in Pencil) = Simple Ink
- S (while in Pencil) = Shading Mode
Zoom
Zoom Tool Shortcut: Z
LClick/RClick (while in Zoom) = zoom in/out
Move mouse horizontally while holding either click = zoom in/out continuously
This focuses on the pixel you have selected, so very useful for focusing in on a specific pixel/area.
Marquee Tool
Marquee Tool Keyboard Shortcut: M
This tool lets you select an area that will allow only that area to be worked on. For example, you can select an area then your brush will only paint that area, even if you go outside of the box while painting.
There is also a lasso option and a wand option. The lasso option lets you draw an area to cover manually, and the wand option selects all similarly colored contiguous pixels (similar to a bucket tool).
Move Tool (Layer Selector)
Move Tool Keyboard Shortcut: V
This lets you move an entire layer. This can also select the layer you click on when the “Auto Select Layer” option is toggled ‘On’. They use this feature a lot as more of a layer selection tool than it’s base movement functionality to quickly swap between layers.
Operations Across a Selection
Aseprite is very good at allowing you to select multiple items at once and applying an operation to all of them at once.
Examples:
- Select several colors in the palette and increase all of their brightness values an even amount.
- Select multiple frames and perform a color swap (i.e. change all of one specific color found in all the frames to another specific color)
- That can be done along with the marquee tool to only change the colors on every frame within the area selected by the marquee tool on every frame.
Other Strong Features (Replace Color and Outline)
Replace Colors: Shift + R
Outline: Shift + O
Outline is extremely strong for creating outlines around an entire body. The outline can be placed on the inside or outside of the body. Their are options for creating a rounded or square outline, as well as only outlining horizontally or vertically. It also includes a tool to fine tune which types of corners to include extra squared off pixels or not.
Export Options
Exporting for General Sharing
Resize during export can be beneficial for sharing your work often as if will often be very small, so it will either show up extremely tiny or very blurry if resized by your sharing option.
You can also choose specific layers or specific frames to export. Exporting multiple frames can allow you to export as a .gif file.
Exporting as Game Asset
DO NOT CHANGE SIZE WHEN EXPORTING FOR GAME ASSETS!!!!
For exporting multiple frames as a sprite sheet:
- Press Ctrl + E
- Sheet type: by rows, by columns, etc.
- Still choose layers and frames
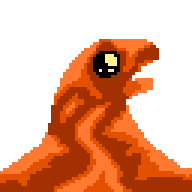
Quick Art Sample I Create Learning Tools
Here is a quick lava creature I was able to create while learning to use some of the tools and workflow exhibited in this tutorial.
Workflow Summary
Common tools:
- Pencil (Brush)
- Eraser
- Eyedropper
- Zoom
- Marquee
- Move
They use pencil and eraser to draw out the initial silhouette. Next, they add a couple shading colors to the canvas so they can quickly move between those colors with the eyedropper tool to apply shading. Shading mode on the brush tool can help with this once you are a bit more advanced.
The zoom tool helps focus in on specific pixels or areas for shading, coloring, and detailing, as it will focus in on the pixel you are hovering. The marquee tool helps with focusing your work on a specific area without affecting the area around it.
The move tool is actually a very strong layer selection tool with the “Auto Select Layer” option. This helps them move between different layers quickly.
via Blogger http://stevelilleyschool.blogspot.com/2021/02/aseprite-crash-course-by-adamcyounis.html