Architecture AI Pathing Project: Selecting Spawn and Target Positions from Objects in the Model

November 23, 2020

Spawning and Pathing System

Architecture AI Project


Updated Spawning System to Use Objects within Model as List of Options

We wanted to update the spawning system so that instead of being arbitrary points, both the spawn location and target location were tied to objects that could be found throughout the entire model. The system is already creating a list of all the objects within the model for applying colliders and various other components, so that could be accessed for this purpose as well. This list of objects was then put into a UI dropdown for selecting both the spawn position and the target position. The transform of the selected object was then used for that respective part of the pathing.

Highlighting the Spawn and Target Locations

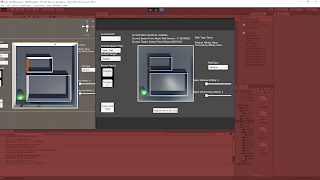
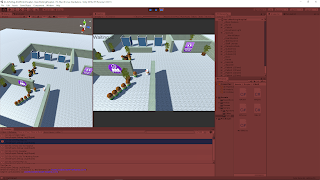
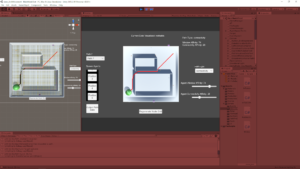
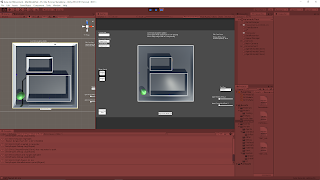
I wanted to highlight both the spawn and target objects to make it more apparent where the agents would be aiming to path. The first implementation I went with for now changes the material of the object. The spawn object becomes an orange color, and the target object becomes a green color. This however is not very clear with many objects, because some such as windows and doors are within the walls, which are hard to see from the angle we are using currently. I will be exploring better options such as spawning an extra object or UI element around the area to make it more apparent.

Example Images Showing a Few Paths with Varied Spawn and Target Positions

Next Step

We want to determine how we want to narrow down the list of options to select as spawn and target locations since we generally will not need access to every single object. We have to decide how flexible the options need to be, as the more rigid it will be the more we can automate it and narrow the options down to a select few.

via Blogger http://stevelilleyschool.blogspot.com/2020/11/architecture-ai-pathing-project_23.html

Reference List for Creating State Machines in Unity with Focus on Character Controllers

September 23, 2020

State Machines

Unity and Character Controller Focus


Title: The State Pattern (C# and Unity) – Finite State Machine
By: One Wheel Studio
Youtube – Tutorial #1


Title: How to Code a Simple State Machine (Unity Tutorial)
By: Infallible Code
Youtube – Tutorial #2


Title: Complex Enemy Behavior using Finite State Machines – 2D Platformer – Part 13 [unity]
By: Bardent
Youtube – Tutorial #3


Title: State Machine Setup – 2D Platformer Player Controller – Part 21
By: Bardent
Youtube – Tutorial #4


Title: Movement State Machine – Free download
By: Epitome
Youtube – Tutorial #5


Title: Unite 2015 – Applied Mecanim : Character Animation and Combat State Machines
By: Unity – Aaron Horne
Youtube – Tutorial #6


Overview

I have dealt with using state machines before, but mostly for creating AI systems. I wanted to investigate using a state machine specifically for a player controller, focused on 2D player controllers if possible. With this in mind, I just gathered many resources on more general state machine concepts and design with a mix of more player controller focused examples when possible.

The quick breakdown is as follows:

  1. Tutorial #1 – General Finite State Machines
  2. Tutorial #2 – General Finite State Machines
  3. Tutorial #3 – AI Finite State Machines
  4. Tutorial #4 – Player Controller Finite State Machines
  5. Tutorial #5 – Player Controller Finite State Machines
  6. Tutorial #6 – Player Controller/General Finite State Machines

Tutorial #1

This is a great quick tutorial on Finite State Machines and implementing them in general in C# and Unity. It covers the various levels of state machine implementations and the pros/cons of each tier of state machine organization. This is a fantastic starting point for state machines.

Tutorial #2

This tutorial is a more general state machine but it does still have a focus on turn based gameplay. While I was focused on player controller FSMs, I am also interested in how to use these for game states in turn based play so I wanted to record this.

Tutorial #3

This tutorial focuses more on AI FSMs, which I have more experience with, but I still wanted to grab a reference to this as a decent looking tutorial on implementing an FSM in general. I also have another Bardent tutorial that is a player controller focused FSM so I thought this also might help me tie in my prior experience if I followed this approach.

Tutorial #4

As mentioned above, I have two tutorials from the same tutorial set and this is the second. I am hoping there is an overlap in the two systems that I can also take away from by observing what they are able to recycle between them. I also hope this will help make this FSM make more sense since I can tie in my prior AI FSM experience.

Tutorial #5

This is a quick tutorial that directly shows the setup for a player controller FSM. It appears that it might not be the ideal architecture I am looking for, but it could still serve as a good example when starting to design a player controller FSM.

Tutorial #6

This older (from 2015) Unite talk goes a bit more in depth into the combination of character animation and combat state machines. This could be a strong next step for me to look into after focusing on movement for the core of the player controller state machine. I am especially interested in seeing if I can implement their combat combos with their FSM approach in some capacity, as well as if they have an input buffering design I can learn from.

UnityLearn – AI For Beginners – GOAP – Adding Goal Challenge & Taking a Break

August 19, 2020

AI For Beginners

Goal Orientated Action Planning (GOAP)

Parts 14 and 15


Beginner Programming: Unity Game Dev Courses

Unity Learn Course – AI For Beginners

Adding Goal Challenge

Adding Goal Challenge

My Approach

This tutorial starts with another challenge to implement a new GAction. This time it is the GoHome GAction for the patient to return to a transform tagged “Home” after they receive treatment. This was rather straight forward as I created this new GAction that just had a Preperform method setting the target to the tagged gameobject “Home” and putting in the Postperform method that the TreatingPatient world state should be reduced by 1 (since they have finished being treated).

Once this GAction was applied to the patient, it needed to connect to the previous action by having a precondition of “isTreated” and I added an after effect of “isCured”. The “isCured” state was also added as the new secondary subgoal of the patient GAgent to ensure they would move entirely through the chain of actions. I did initially just add “isCured” as a 3rd goal (keeping the 2nd goal of “isTreated”) but this created a strange behavior where the agent would take one extra step of actions and return to the hospital entrance after returning home.

Their Approach

They named their new subgoal “isHome”, which I think is important to note because I think with a system like GOAP you should keep in mind that the actions should be somewhat isolated for their specific purpose and you should at least be cognizant of chaining the actions together too much for what you think their intended purpose may be and recognizing when to keep them more encapsulated as their own action. It makes sense that the patient’s true goal is just “to get home” and getting cured of their ailments is just an obvious way to us to achieve that goal given the settings, but being cured is just a major step towards simply getting home.

They also added an extra step of states for the patient agent. I simply connected the previous action to the new action by matching the GoHome action’s precondition with the GetTreated after effects (“isTreated”), but they actually had the GetTreated action modify the state of the agent to add “isCured” and used this (“isCured”) as the precondition for their GoHome action.

While this does not seem necessary in the current state of the tutorial, I think this makes sense to add this step when developing a real GOAP system because there could be several ways for a patient to be cured (such as simply waiting it out if it is a minor ailment like a cold). So this approach may make more sense when building a proper system, which again, is good to note for the future if building a system like this for your own project.

I ran into an issue where the patient agent was not leaving the waiting room, and it turned out this was because I still had the “isTreated” intermediate subgoal commented out because it was necessary for my approach to work. Adding this subgoal back in (along with the additional “isHome” goal) allowed the agent to work properly again.

Errors

They ran into a problem with the tutorial (that I also replicated) when they turned the spawner back on to add many patients to the system. Many of them began congregating at the hospital entrance, which was due to the fact that “isTreated” was one of their subgoals and it was being immediately met because the first patient treated added “isTreated” to the entire world state so every patient thought it was already treated.

This led to them pointing out a rule of thumb where you do not want any of the subgoals of the agents to match a state that is directly added to the world state or the agent’s beliefs. So to follow this up, I changed the world state modification within the GetTreated action from “isTreated” to just “Treated” (this appears to be what they did in the tutorial but it is not clearly stated).

While fixing this, they also note a possible issue with the NavMesh system in Unity. Something about the NavMesh that even when it gets a path it thinks the destination was the previous destination, so it returns that the path was “completed” before the agent actually gets there. This can cause agents to start on the next action since many are location based. This was clarified to possibly be a result of their large update method within GAgent that is using NavMesh’s SetDestination method. They suggest that the loop may be processing through again before the SetDestination has been fulfilled which can cause issues.

Distance Check

To solve this issue they decide to just have their own distance check for destinations. For this they just did a basic distance check between the agent’s position and its destination position.

Speeding Up the System

To help with the debugging process they simply sped up the entire game system. This can be done very easily by just setting Time.timescale to a value greater than 1.0 anywhere in your scripts. This is actually very handy to know and would be an insanely useful tool moving forward to add to a major static debugging script for any project that could be toggled and edited to help with various debugging processes (i.e. they just added that line to the GWorld class since it’s a systematic static class).

With all of these fixes and modifications in place, the system now appears to run rather smoothly and appropriately. It was working so well I tested adding another nurse agent to see how it would adapt and it continued to work flawlessly. The new nurse would properly grab patients that the other nurse was not treating and take them to a different cubicle to treat them, so there was no strange noticeable overlap of actions.

Taking a Break

Taking a Break

This tutorial looks at adding a Rest action to the nurses so they will sometimes take a break and move to the lounge area to regain energy to continue working. To begin, they added a small method within the nurse GAgent class to modify their beliefs every so often to add the exhausted state to them. This gets the exhausted state into the overall system to help start allowing it to control their actions.

They then added the new action named Rest which simply has a Postperform method for removing the exhaust state. This paired with adding a duration to this action is all that is necessary to provide a timed cool down for the nurse to remain out of commission for a time before coming back to action rested.

How they set it up the nurse agent’s are only able to rest if there is time (so either there are no patients or no available cubicles). So when there is only a single nurse and a lot of patients, the rest action is never seen. To show it working, they added several nurses (about 5) to the system. Once this was done, it could be seen that occasionally when a nurse was finished treating a patient they would go to the lounge area instead of directly to another patient. They would then come out of the lounge to grab a patient after being rested and having another action to perform.

Finally, they added the removal of the patient agents once they returned home just to keep the system cleaner. This was very simple as they just added Destroy(this.gameobject) to the Postperform method of the GoHome action.

The following is a quick link showing my finished GOAP tutorial project in action
Link to Video of My Completed GOAP Tutorial in Action

Summary

This overall tutorial was amazing for introducing me to a new AI system. I still need to look over some of the foundational interactions of the major classes, but I understand the system from a conceptual view pretty well now and it seems very useful as another AI option depending on your case.

The next to last class (Adding Goal Challenge) was very useful for understanding some of the issues you can run into and how to ensure the system runs smoothly and controlled. Understanding keeping the states very separated between the different actions/agents and the overall world state is crucial to make sure you do not get some nasty bugs. Then the speed up feature available in Unity is definitely something I need to take more advantage of when debugging in particular.
UnityLearn – AI For Beginners – GOAP – Implementing the Inventory System & Moving the Nurse

August 13, 2020

AI For Beginners

Goal Orientated Action Planning (GOAP)

Parts 12 and 13


Beginner Programming: Unity Game Dev Courses

Unity Learn Course – AI For Beginners

Implementing the Inventory System

Implementing the Inventory System

They begin this tutorial by adding another simple GAction to the patient agents named GetTreated. They follow this up by adding a WorldStates object to the GAgent class (named beliefs) as well as a WorldStates object in GAction that references the GAgent’s beliefs (similar to how the GInventory reference was passed between GAgent and GAction).

They then add some logic to the GAction GoToWaitingRoom to add the atHospital state to the beliefs of the GAction itself. Upon running it there is an error because the GPlanner has not been built to handle beliefs (the internal WorldStates of the GActions or GAgents). To solve this, they add a Node overload constructor to the GPlanner class to also take in a WorldStates reference to accept and use the beliefs as well in its planning process.

They left off with a challenge to add a GAction to the nurse agent to have them go to the same cubicle as the patient they are treating. In doing so, I created a new GAction named TreatPatient. This GAction used the same PrePerform method as the GetTreated GAction of the patient (which searched that GAction’s inventory for a gameobject tagged with “Cubicle” to set as that GAction’s target). The PostPerform method did not matter so it solely returns true (since it’s at the end of the actions).

This took care of the programming for the most part. I then had to add the GAction to the nurse agent and setup the the preconditions and after effects. This was as simple as using the previous action’s after effects (treatPatient) as the precondition and adding a new after effect to tie in as the state we wanted to add for the new goal (which I named patientTreated). Aligning this final after effect as a goal was done by going into the GAgent Nurse class and adding a new subgoal with this additional state.

While this did work, I was unsure how the target was properly obtained through the new GAction’s inventory with just the FindItemWithTag method. I did not fully understand how this new GAction had anything in its inventory already, let alone the proper cubicle used by the patient. I am hoping this is cleared up in the next tutorial.

Moving the Nurse

Moving the Nurse

They start by going through the challenge they left off with in the previous tutorial. Initially they use the same PrePerform method I used, which was from the GetTreated GAction. However they added several parts of logic to the PostPerform method. They added another state named TreatingPatient to keep track of how many patients are currently being treated and they added logic to add the cubicle used back to the overall pool of cubicle resources in the world when they were finished with it, as well as removing it from this object’s inventory itself.

Since these PostPerform methods are informing the world state and the amount of resources, they reiterate that it is important to make sure that this is only done once by a single agent to make sure the amount is kept accurate. For example, there could also be an opportunity to have the patient add the resources back to the world pool when they are done being treated, so just be sure you are not adding resources to the pool more often than planned.

Unfortunately this did not answer my question on how the GAction inventory is effectively passed throughout the GAction chain of events, so I will have to do some further investigating on my own. However, their approach was much cleaner and direct than mine which is good to learn from when adding these various GActions to the GOAP system.

Summary

The concept of the inventory system for the overall GOAP system is very nice, as it allows the designer to basically add anything into the system as a resource of sorts to inform and dictate the actions the agents perform. However I was having some trouble following exactly how the agents were able to keep track of the inventories as their is a global world inventory as well as individual inventory objects for the GAction and GAgent classes, so every single action and agent has their own inventory as well. It will take further investigation for me to truly understand exactly how everything is tied together.

UnityLearn – AI For Beginners – GOAP – Adding More Resources to the World

August 10, 2020

AI For Beginners

Goal Orientated Action Planning (GOAP)

Part 11


Beginner Programming: Unity Game Dev Courses

Unity Learn Course – AI For Beginners

Adding More Resources to the World

Adding More Resources to the World

The next step is setting up the use of the cubicles in the world. Similarly to patients, these cubicles act as a resource available to the agents. Therefore they must be monitored by the world state in some way to determine how many are available and which ones so they can be distributed properly when needed.

Setting this up was very similar to how the patient resources were. They added a queue of gameobjects to hold the cubicles in the GWorld class. This was a bit different as it also initialized full of resources, so the cubicles were immediately added to this queue (through FindGameObjectsWithTag) upon initialization. Then again similar to patients (except through the GWorld class itself instead of an action) a state was added to the WorldStates named “FreeCubicle” with a value equivalent to the number of cubicles.

Having these resources that are not other agents leads them to create a new class called GInventory to help organize and allocate these resources. The class created a list of gameobjects named items which effectively just stores whatever gameobjects may be needed as resources. The overarching GAgent class then had a GInventory added to it so all agents could access this pool or resources.

They then move on to the GetPatient GAction again to modify it to work with this new GInventory setup. They have added a gameobject named resource to hold a reference to a cubicle. The Preperform method of the GetPatient GAction now grabs a cubicle from the world state (if one is avaiable) and references it through this resource. If successful, it uses the WorldStates ModifyState method to reduce the “FreeCubicle” state by 1 through the following line:

GWorld.Instance.GetWorld().ModifyState(“FreeCubicle”, -1);

Similarly, the Postperform method of this GetPatient GAction now uses ModifyState to reduce the count of the “Waiting” state by 1 to account for the patient that is removed from the waiting status. Since every agent has a GInventory of their own now, this patient agent is given a reference to the same cubicle resource the nurse agent is using so that in the next steps they can travel to the same cubicle.

Summary

The addition of the GInventory adds another interesting avenue for organizing and allocating resources for the system to use. The following tutorials support the start of its utilization so I am interested to see how they further use this inventory system to properly maintain control of the resources of the world.

UnityLearn – AI For Beginners – GOAP – Creating a Multi-Step Plan & Plans That Require Multiple Agents

July 30, 2020

AI For Beginners

Goal Orientated Action Planning (GOAP)

Parts 9 and 10


Beginner Programming: Unity Game Dev Courses

Unity Learn Course – AI For Beginners

Creating a Multi-Step Plan

Creating a Multi-Step Plan

This tutorial begins linking multiple actions together to create more intricate action plans. To do so, they created a second GAction, GoToWaitingRoom. GoToHospital action was given an after effect of hasArrived and GoToWaitingRoom was given a precondition of hasArrived to give them a point to link together. GoToWaitingRoom was then given the after effect isWaiting, so that the goal given would match up with this second action’s outcome. This let’s the system take an input goal of isWaiting and deduce the plan of action to get there through these two actions.

Just to better visualize this demonstration, they created a basic spawner to consistently spawn in new patients to show that the newly created objects can follow the plans created properly as well.

Plans that Require Multiple Agents

Plans that Require Multiple Agents

I immediately had issues with this tutorial because they give a couple scripts directly to you for use in these next steps and they had compile errors in them that stopped me from progressing. These are the GAgentVisual and GAgentEditor classes. One of the first steps requires you to add the GAgentVisual component to the Patient game objects but I could not because of errors in the GAgentEditor class.

The issue was that it did not recognize the lists of preconditions and after effects within the GActions as KeyValuePairs. To resolve this, I modified them to go through the lists as WorldStates and just use those key values instead of the very direct Key values of a KeyValuePair. This at least removed the compile errors initially so I could progress.

This visualizer however is a nice addition. It lays out the individual agent’s plan as well as the preconditions and after effects throughout the process to help the designer keep track of what is going on behind the scenes. This is just generally helpful as well as a useful tool for debugging.

This tutorial begins to work with the nurse agents in the scene. Their first action is GetPatient, but it requires a precondition that is triggered by a change in the world state (beginning the idea of having plans involving multiple types of agents). This is done by adding the following line to the GoToWaitingRoom class:

GWorld.Instance.GetWorld().ModifyState(“Waiting”, 1);

To aid the nurses in keeping track of the patients, a queue of gameobjects holding the patient references was added to the overarching GWorld class. This gives a world state parameter to keep track of patients that the nurses can reference.

Getting the world states involved in the planning process has finally necessitated adding some logic to the Preperform and Postperform methods of the GActions. The patients GAction GoToWaitingRoom has a Postperform which informs the world state that more patients are waiting and adds them to the queue, while the nurses have a GAction GetPatient with a Preperform which checks if there are any patients in queue and sets their course for that target only if there is anyone waiting. This also begins the option of having plans “fail” because the goal cannot be met at this time.

Tutorial Progress Showing Patient and Nurse Agents in Action

Summary

These two tutorials have finally started showing the actual effects of this GOAP system. It shows how creating simple lists of actions can be done easily by the designer, as well as how much easier implementing world state AI is with this system. All of the data is nicely contained and distributed throughout the GActions, the GPlanner, GAgents, and the GWorld. I am excited to see how adding values to the different actions works out and how easily it is implemented on the design side.

UnityLearn – AI For Beginners – GOAP – Executing a Simple Plan

July 21, 2020

AI For Beginners

Goal Orientated Action Planning (GOAP)

Part 8


Beginner Programming: Unity Game Dev Courses

Unity Learn Course – AI For Beginners

Executing a Simple Plan

Executing a Simple Plan

This tutorial starts by actually implementing the newly created planner setup within the agents themselves. This involves creating a rather bulky LateUpdate method within the GAgents class which tries to handle all the possible cases of different states of having a planner and having actions to perform.

This LateUpdate can be broken down into four main sections:

  1. Continues running an action that is in progress
  2. Generates a plan and possibly an action queue if they are not already present in agent
  3. Removes goal and planner once entire action queue is used up
  4. Selects the next action in queue to start performing

They then created a new Patient class (which inherited from GAgent) to place on the patient agents and they created a new GoToHospital class (which inherited from GAction) to give this agent something to use with the planner. This was done to simply show the interaction of all these class types, the GAgent, GAction and GPlanner.

Summary

While brief, there is a lot going on in the GAgent class with this tutorial. I feel like having such a heavy Update type method (LateUpdate in this case) is not normally ideal, so there may be better ways to condense that section into separate methods or have other parts of the system help make some checks to support the GAgents class.

UnityLearn – AI For Beginners – GOAP – The GOAP Planner

July 21, 2020

AI For Beginners

Goal Orientated Action Planning (GOAP)

Part 7


Beginner Programming: Unity Game Dev Courses

Unity Learn Course – AI For Beginners

The GOAP Planner

GOAP Planner – Part 1

Planner starts by looking through all the achievable actions and finding which can be performed given the starting states from the first node. This can create the branches for the action network which will then continue to have actions connected to them (that satisfy the state conditions) until a chain is found that has a result which matches the initial goal.

GPlanner Class

The first major step of this class is creating the Plan method which returns a Queue of GActions (this will basically be the full list of actions that will be chosen to actual be acted out). This starts by making a List of usable GActions (those which satisfy the IsAhchieavable condition).

They then start a List of the newly create Node class objects, which acts as a more encompassing container for a GAction object. The most important data of which is the running cost of the entire branch of Node objects. This allows for the next step where they go through the list of Nodes (named leaves) to find the cheapest Node (which in turn is the cheapest path). The running cost is an assumption of the capabilities of the BuildGraph method they added in the middle of this process they have not yet defined.

Finally another List of GActions is created. This time the list is simply created by starting with the cheapest Node and following it back to the original Node through their parents contained within the Node class (this is basically a linked list, and also works similarly to the basic A* node/waypoint reading method I have worked with).

C# Note

When creating the Node helper class they made sure to create a new Dictionary and pass it the values from the other Dictionary since they wanted a new copy of that Dictionary. It is important to note that if you simply set the Dictionary equal to the other Dictionary that it becomes a pointer to that Dictionary as opposed to its own separate new Dictionary.

GOAP Planner – Part 2

This tutorial focuses on building the BuildGraph method for the GPlanner class. It is noted ahead of time that this method will strongly rely on recursion.

The BuildGraph method returns a bool value and has input parameters: Node parent, List leaves, List useableActions, and Dictionary goal. It begins by searching through the List of useableActions to determine which are achievable given the parent Node’s state.

For each achievable action, it creates a replica state of the parent Node’s state, searches through all the effects of that action (resulting states from performing the action), and adds any that are not already found in the current state to that replica state. This setup allows the method to predict what the chain of states would look like if it were to progress through these actions so it can determine a plausible entire chain of actions.

Using all of this information, a new Node object is created which receives the parent Node as its parent, the parent cost combined with the current action’s cost as its cost, the modified parent state as its currentState, and the action itself for its action.

Finally the recursion comes in to finish out the method. If the goal is achieved as indicated by the modified currentState outcome, the newly create Node is added to leaves, the true list of actions to perform. Otherwise, a new subset of actions is created from the full list of usableActions and passed into the BuildGraph method recursively (this subset simply removes the action it just tried since it was deemed ineffective). This continually shrinks down the list of actions to create the terminal condition for this recursive method. GoalAchieved and ActionSubset are two more methods used within this method to help with this final recursive step.

Summary

This section was very coding heavy and got deep into the core of creating the GOAP AI system. The GPlanner class is doing the heavy lifting of finding which actions are viable for an agent to perform and determining what chain of actions can get the agent from its initial world state to its final goal state it is aiming to achieve.

Architecture AI Prototype Historical Path Visualization and UI Updates

July 1, 2020

Architecture AI Project

Added Path Visualization and UI Updates

Introduction

To top off the prototype, we added a quick visualization tool to show any paths that agents have taken within the current game session. This was necessary to make it easier to compare the paths of various combinations of agents and environments even. Along with this, some elements of modifying the system that were only accessible within the Unity Inspector have been moved to the in game UI. This makes it much more manageable to alter the agents and their pathing for Unity users and non-users alike.

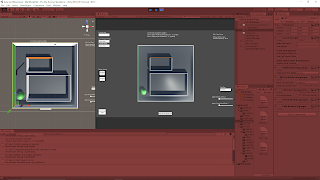
The following quick reference image shows an example of this new path visualization tool (the red line going through the diagonal of the area).

Reference for New Path Visualization Tool (the Red Line is the Path)

Vimeo – My Demo of the Past Path Visualization Tool (with New UI Elements)

Past Path Visualization Feature

Visualization

The path data was already being recorded in an in-depth manner for storing the data in a text format for export, so here we just focused on using that data during the game session to provide another useful data visualization tool. This data is kept as an array of Node objects, which in turn individually hold information on their world position. This provided a solid foundation to visualize the information again.

The array of Nodes could then provide me with an array of world positions which I could use with Unity’s line renderer to create a basic line connecting all of these points. Using the line renderer component also leaves the tool flexible through the Inspector to modify how the line is drawn to fit different needs or environments.

Dropdown UI

To make this easy to access for the user, I added a Unity dropdown UI element to the scene to hold information about all the past paths. It initializes by creating a newly cleared dropdown and adding a simple “None” option which helps keep everything in line, as well as providing the user an obvious spot to go back to when they don’t want to show any previous paths. Then as paths are generated, more options are added to this dropdown to keep it in line with all the paths created (this also keeps their indices in sync for easy reference between the dropdown and the recorded paths).

Added UI Elements for Operating System

As a prototype tool, a quick way to allow for tweaking values and controlling assets is to just use public variables or Unity tool assets (like Unity Ranges and enums within the scripts). This became even cumbersome for myself, so it could be a large issue and slow down for less savvy Unity users. This made me want to explore moving some of these parameters into the game UI for easier use.

Agent Affinity Sliders

I looked into creating Unity UI sliders and since there were pretty easy to implement I moved the range sliders from the Unity Inspector for setting the different agent affinities for the next spawned agent to the game UI. This was straightforward in that the slider values could almost directly be transferred to the spawnmanager (The slider actually goes between values of 0.0 – 1.0 and is multiplied by the max affinity value of the system to properly stay constrained within that range).

Agent Pathing Type Dropdown

After exploring the dropdowns for the path history visualization tool, I also decided to use them for determining the path type of the next spawned agent. This allows the user to quickly choose between different architectural types to use to calculate the agent’s pathing.

Since the architectural types are within a public enum, the dropdown could be populated by the ToString() versions of this entire enum (which can be cycled through in C#). Since they are populated this way in order based on the enum itself, the dropdown can inform the PathFindingHeapSimple (the class that needs to know the type in order to determine which pathing calculations to use) based on the enum index number. They should be kept in sync based on the way the dropdown is created.

Summary

The past path visualization tool is very useful for comparing paths a bit more quickly (since changing values for individual paths can take a small bit of time). It may help in the future of the project to visualize multiple paths at once to directly compare paths very easily. The system also displays information about the path it is showing so the user knows better why the path is the way it is.

Unity’s UI elements are pretty easy to work with, and adding methods to their OnValueChanged delegate is a very nice and consistent way of only calling changes/methods specifically when a UI element is modified. This was perfect for both the dropdowns and the sliders since they only need to invoke change within the system when their values are changed. This keeps them a bit cleaner and more efficient.

The UI elements are strongly tied to the borders of the screen using the standard Unity positioning constraint system, so it can look really messy at smaller resolutions. It operates well enough since there’s not too much going on, so just allocating a decent resolution to the window when using it at least shows everything which is the most important aspect for a prototype.

Architecture AI Completed Prototype with Data Visualization and Pathing Options

June 24, 2020

Architecture AI Project

Completed Project Prototype

Introduction

We were exploring different methods for importing architectural models into Unity and decided to try Revit to see what it had to offer. The models are easy to move between softwares, and it also creates .cs scripts that Unity can use to provide some interactive data visualization when using the Revit models.

Data Visualization Options

I moved everything dealing with the major logic of the A* grid node visualization into its own class named AStarGridVisualization. This allowed me to continue to hold on to all the different debug visualization methods I created over the course of the project and convert them into a list of options for the designer to use for visualization purposes.

As can be seen in the demo, there is a list of options in the drop down list in the Unity Inspector so the designer can tell the system which data to visualize from the nodes. The options currently available are: Walkable, Window, and Connectivity. Walkable shows which nodes are considered walkable or not. Window and Connectivity show a colored heat map to show those respective values within the nodes themselves.

Changing Values Used for Pathing

The project wanted to be able to use different types of values to see their effects on the agents’ pathing, so every node has several different types of architectural values (i.e. Window and Connectivity). Using the window information for pathing will give different agent paths than when using the connectivity values, because the agents have different affinities towards these types of values and the nodes have different values for these different types contained within the same node.

The PathFindingHeapSimple class handles the calculations for the costs of the paths for the agents, so I have also located the options to switch between pathing value checks here. This class is responsible for checking nodes and their values to see which lead to the lowest cost paths, so there is another drop down list available to the designer here that determines which architectural value type these checks look at when looking at the nodes. This allows the designer to choose which architectural value actually influences the agents’ paths.

A* Node Grid Construction Options

This point of the project was still working with various types of model imports from various softwares to find which worked the best and most consistent, so I added some extra options for generating the node grid in the first place to give some quick options that may better help line up the node coverage area with the model at hand. These major options located in the AGrid class itself are: GridOriginAtBottomLeft and UseHalfNodeOffset (the third is determining whether the system reads data from a file or not to add values to the node grid, but that’s a more file oriented option).

GridOriginAtBottomLeft

GridOriginAtBottomLeft determines where Unity’s origin is located relative to the node grid. When true, Unity’s origin is used as the bottom left most point of the entire node grid. When false, Unity’s origin is used as the central point of the generated node grid.

UseHalfNodeOffset

UseHalfNodeOffset is responsible for shifting the nodes ever so slightly to give a different centering option for the nodes. When true, half of the dimension of an individual node is added to the positioning vector of the node (in x and z) so that the node is centered within the coordinates made by the system. When false, the offset is not added, so the nodes are directly located exactly at the determined coordinates.

File Reading to Set Values Within Nodes

There are two major ways to apply architectural values to the nodes: using architectural objects (within Unity itself) or reading data from a file. The data files contain x and y coordinate information along with a value for a specific architectural value for many data points throughout a space. These files can be placed Unity’s Assets/Resources folder to be read into the system. The option referenced above in the AGrid to read data from a file or not is the IsReadingDataFromFile bool, and it just tells the system whether or not to check the file told to the system to assign values to the grid.

The FileReader object holds the CSVReader class which deals with the logic of actually reading this file information. The name of the file to be read needs to be inserted here (by copy/paste generally to make sure it is exact), and the dimensions of the data should be manually assigned at this time to make sure the system gets all of the data points and assigns them to the grid appropriately (these data dimensions are the “x dimensions” and “y/z dimensions” ranges of the coordinates within the data).

Demonstration of Prototype

This demonstration helps show the different data visualization options of the grid, the agent spawning system, how changing the architectural value path type changes the agents’ paths, and how a lot of these systems look in the Unity Inspector.

Vimeo – Architecture AI Project Prototype Demonstration

Summary

I really liked a lot of the options I was able to add to help increase the project’s overall usability and make it much easier to switch between various options at run time to test different setups. The end product is meant to help users that may not have a lot of Unity experience, so I tried to reduce the learning curve by making a lot of options easily accessible with visible bools and drop down lists, while also providing some simple buttons in the game space to help with some other basic actions (such as spawning new agents).

Many of the classes were constructed with scalability and efficiency in mind, so expanding the system should be very doable. However much of this scalability is still contained within the programming itself and the classes themselves would need to be modified to add more options to the system at this point (such as new architectural types). This is something I would like to make more accessible to the designer so that it’s intuitive and possible to modify without programming knowledge.

The file reading system works well enough for these basic cases, but it could definitely use some work to be more flexible and work with various node grid options. This is something I could use more work on in general, and having systems to read in files and output files to record data would be useful to understand better in general.