Feb. 18th, 2018
Creating Multiple Copies of Models with Different Parameters – Maya
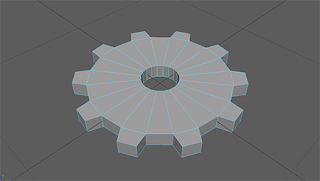
As was mentioned in the last post, it seems that it was effective to save an original copy of models of mechanisms in Maya with the past transforms and history in tact to edit to create modified versions of said object. Using this, I was able to create another gear that simply had double the radius of the original, and export that model to Unity as a separate object.
Colliders for Gears in Unity
Placing Colliders
- Create gameObject – cube
- Remove components: Mesh Renderer and Mesh Filter (leaves cube’s collider: this collider has more flexibility for more complex designs)
- Set this as a child of the original game object of choice (the gear model in our case)
- Need to position with local x and z position relative to parent, as well as correct rotation, to fit collider to single gear tooth
- Determine angle value (&Theta) between centers of teeth (use 360deg / # of teeth)
- Use x = Rcos(&Theta) and z = Rsin(&Theta) (where R is radius of gear object, or centers of colliders)
- To use those formulas for all teeth, just use values of: n * &Theta, where n consists of values 1 – # of teeth
- You will also want to rotate the colliders around the y-axis equal to the &Theta value used to locate them
It is important to note that the initial collider may not always be at 0 degrees. It may be offset by several degrees. This was determined by visually lining up the first collider with a few different degrees until it appeared to be correct, then the calculated &Theta values were added to this initially discovered value (instead of the assumed zero).
Driving Gear Mechanisms in Unity with Physics Engine
Using the previously described techniques for modeling gears, two gears of different radius values were created to set in Unity (R = 0.5 and R = 1.0). These were all setup with Rigidbody components, and parented to colliders representing all of the teeth, using the above method. Both object’s rigidbody components froze every constraint except for “Rotation on the y-axis (Those frozen include: movement in x,y,z and rotation on x, z). The larger gear was given a basic script that caused it to rotate about the Y-axis over time. It was hoped that this could be placed in a way that rotating this large gear would cause the colliders between the two gears to interact and physically rotate the second gear. Below is a video of it in action.
Example Video of this Gear Animation in Motion

