HFFWS Thesis Project – Theory for General Generation System Architecture

November 6, 2019

HFFWS Puzzle Generation System

General System Architecture

General Notes

Pulley Varieties

I wanted to start with sketching out the general structure of a single puzzle type to help me get a better idea of what a useful general structure might look like for the overall puzzle generating system I want to make.

  • Hook on an end to latch onto other objects
  • Object to move can be used as a platform
  • Open heavy door
  • Focus on rotation of wheel
  • Build a pulley
  • (Rope puzzle) Move two rope conjoined objects somewhere to accomplish a goal

Breakdown of what I can currently alter/generate in rope/pulley tool

  • Objects (at ends of rope)
  • Objects (for wheels)
  • Length (of rope)
  • Position (of rope)
  • Position(s) (of wheel(s))

I then quickly sketched out what I could change with the current controllable parameters to match the various puzzle variations (I only did the first three for now just to work it into testing quicker).

Hook on end

  • Objects at ends
    • Hook
    • Grabbing Mass (i.e. small sphere)
  • Outside objects
    • Objects that need pulled by hook

Objects attached can be used as platforms

  • Objects at ends
    • Platform type objects
  • Outside objects
    • Mass objects to influence pulley movement

Open heavy door

  • Objects at ends
    • Heavy Door
  • Outside objects
    • Mass objects to influence pulley movement

Architecture Design (1st Pass)

The overall flow of information is:
GenerationManager -> ScenarioManager -> “Create” type classes

GenerationManager

Passes down highest level information to ScenarioManager. This will include puzzle type, variation type within that puzzle type, and any other high level information such as overall positioning or how many scenarios in total to generate.

ScenarioManager

Will take that information and use it to determine which “Create” type classes will need to be used (or have the option of being used), how many times to use each, and what other information needs to be passed on to them (the “Create” type classes) to properly build out the desired scenario.

“Create” type Class

Use the information passed down to them from the ScenarioManager to create objects that satisfy the needs of the desired scenario. Within these bounds, in then adds variation to what it creates to vary its creations while still meeting the requirements given by the ScenarioManager

All the “Create” type classes will need an interface or inheritance of some kind to make them all similar types of objects to make grouping them and using them a bit easier.

Thesis Project – Concepts for System to Control Script Timings

October 24, 2019

Working with the HFFWS

System for Properly Timing Running of Scripts

Discovering the Timing Issues with the HFFWS Tools

While working with the Rope script in the Human API, I was again encountering timing issues when trying to accomplish tasks through script. I was having trouble instantiating and connecting rigid bodies to the ends of the rope in script. I ran several tests to confirm the timing issues I was having again.

Test #1
  • 2 Rigid Body objects exist in scene
  • Script has 2 gameObject references for those objects
  • Script sets startBody and endBody references to those objects at Start

This did not work. The references could be seen as being properly assigned in the Rope script in the editor, but that connection was being made too late and having no affect on the objects.

Test #2
  • 2 Rigid Body objects exist in scene
  • Script has 2 gameObject references for those objects
  • Script sets startBody and endBody references to those objects at Awake

This did have the intended result of connecting the rigid body objects to the rope.

Test #3
  • All done in Awake
  • 2 Rigid Body objects instantiated into scene
  • Script sets startBody and endBody references to those objects at Awake

This did work once, although I had some issues repeating it afterward. The objects were prefabs which were instantiated in Awake. GameObject references were created for these, and used for the values of the Rope script startBody and endBody, all done in Awake as well.

Test #4
  • Start or Awake is irrelevant here
  • Object with Rope script starts deactivated
  • 2 Rigid Body objects instantiated into scene
  • Script sets startBody and endBody references to those objects
  • Rope object is then activated

This is the best solution that works, as it can be done in Awake or Start. This leads to a much more controllable environment which is ideal for our system. This will be the foundation for the main systematic approach.

System for Controlling Awake Calls for HFFWS Objects

Deactivating/Activating Objects or Enabling/Disabling Scripts

The combinations of all of these tests, most notably Test #4, showed that some important connections are made during the Awake phase of many HFFWS objects. It is important to note that Test #4 specifically indicates that a lot of the important functionality may be happening in the Awake method of the scripts of the individual objects themselves (which is important to differentiate from some system wide class that is making connections in Awake). This important differntiation leads to this option of simply deactivating objects with HFFWS scripts (or possibly disabling the scripts specifically) to force their Awake methods not to run before my systems are ready for them. I can run my scripts, and then activate the HFFWS objects so their Awake methods run at that point instead.

This concept seems the most promising for safely and consistently controlling the timing of my script elements versus those of the HFFWS objects (since I do not have access to their core scripts). As this is a common issue I have run into with many objects, it makes sense to make a small script to attach to any prefabs I will be instantiating which can just hold references to gameObjects and/or scripts that I will need to have deactivated or disabled initially, and then activate or enable after everything is properly set.

Script Execution Order

This was actually the first idea to get around these timing issues, but it seems less safe so it will most likely only be used as a last resort. The HFFWS package already has a lot of various scripts ordered in the script execution order of Unity, so there is already a precedent set by them for when a lot of things should run relative to each other.

To test that this worked in the first place, I ran a test with everything being set in Awake not working but moving it to the first script in the script execution order actually made it work. This was a similar test with connecting rigid bodies to a Rope script object.

This is not an ideal process to use however as it can easily lead to weird behavior that is very hard to debug and will not scale well in general. Because of these factors, I will mostly be looking to expand upon the other system concept.

HFFWS Working with the Rope Script

October 23, 2019

Human Fall Flat Workshop

Rope Script

Identifying Key Components

The main components of controllilng the rope script when it comes to placing it and connecting it with objects, are the handles and the start/end bodies. The handles are transform positions that dictate key points on the rope. Two is the standard, as they determine a beginning and the end for the rope, but more can be used to direct the rope in multiple directions. The start and end bodies are rigid body references which determine objects that will be physically connected to the ends of the rope.

The discovery with how the handles work opens the possibility for more rope configurations other than flat ropes which fall over other objects. Being able to guide a rope around in interesting patterns could potentially allow for setups that are more similar to actual pulley setups, where a rope needs to go around a wheel object at least once.

The first prefab I worked with that used the Rope script had rigid body objects with Fixed Joints on them that seemed necessary at first. While working with another rope using prefab (the hook), I found that it did not use these Fixed Joints. This showed that these are actually not manditory for connecting rigid bodies to the rope. It is just the rigid body reference on the Rope script itself for the startBody and endBody. Further investigation may show what purpose the Fixed Joints served.

Thesis Puzzle Generation – Pulley Information and Variations

October 17, 2019

Thesis Puzzle Generation

Pulley Variants

Pulley Wikipedia Page

Info #1 – Link

By: Wikipedia


Pulley

General

The wikipedia definition of a pulley is:
“a wheel on an axle or shaft that is designed to support movement and change of direction of a taut cable or belt, or transfer of power between the shaft and cable or belt”
The pulleys we will be generating are generally simpler setups. They mostly consist of a rope with a physics object (rigid body) on each end. This is because of how the system is used to create the pulleys. Ropes cannot be intertwined between objects accurately, so they are just generated above their setup locations and allowed to fall into position. As a final note, the pulley can also be tied into demonstrating the wheel and axle simple machine as well.

Varieties

Hook on an end to latch onto other objects

This focuses on the pulley’s inherent nature of changing the direction of force. The hooks allow the player to attach one end to various objects to move them into place. It could also be as simple as lifting other objects.

Object to move can be used as a platform
Focus on rotation of wheel

This would use the weight/friction of rope to rotate/spin the wheel that it is on while rope is moved. I am not sure how well the HFFWS system works with this.

Build a Compound Pulley

Since system does not allow for setup of complex block and tackle style pulleys, setup the environment for the player to build their own. This gets around the inability of the system itself by letting the player set it up. This would require building the environment in such a way (such as veritcal moving platforms or stairs around) to let the player move the rope through a series of wheels to build this pulley.

Lift Heavy Object

One end attached of the rope is fixed to a very heavy or massive object. The other end is where work is done to try to lift the heavy object. Examples of this could be a large door or simply a heavy platform. The system focuses on maximizing the overall force output. This will mostly be done by focusing on the free end of the rope, but applying an aiding upward force to the heavy mass may also be factored in.

HFFWS Fixing and Debugging the Pulley Generator

October 14, 2019

Pulley System Generator

Fixing

Notes:

– Deselecting “Fix Start” and “Fix End” on the Rope component allows for the creation of a simple rope that appears to operate normally, but it is not connected to anything
– “Fix Start” and “Fix End” appear necessary to connect the rope to physics objects

TESTING

Issue 1:

Instantiated Rope is a completely broken mess of physics masses jumping around.

Test 1:

Changing objects at ends to TestBox and TestSphere just to simplify the physics objects involved to see if that makes diagnosing the problems easier

Results:

This did result in a more stable rope. It was still not in the correct location, but the rope was no longer just a jumbled bumbling mess of masses.

Issue 2:

Rope is instantiated in a strange position away from most other objects.

– This appears to be because of the ropeStart and ropeEnd positions. The rope is still following their positions, and they are far away.
– The ropeStart and ropeEnd positions however do have the same Y and Z values, suggesting that they are following the logic to some degree, but not as intended.

Test 1:

Change instantiation process so that pulley end objects are instantiated as children of the overall pulley prefab.

– The idea is that this will help with relative positioning
– I am not sure if I can use this method with a prefab that has not been instantiated yet (seems strange using the transform of an object that does not exist yet)

Results:

– This did properly situate the rope end physics objects at the ends of the rope, however the rope was still spawning in a location that was unintended, below everything else.
– The rope also does not appear to actually be bound by the end objects either.

Test 2:

Debug.Log all the positions to see if the positions occurring at run time are matching those in the script.

Results:

– The script dictates that the start physics object is positioned at (-9.5, 0, 0) – (1.0, 0, 0), so (-10.5, 0, 0) relative to its starting position, and the end physics object is the reversse (+9.5 and +1.0). This indicates that there should be 21 units between them. This did happen, but the values are very different looking.
– The start instantiated at position: (-2.5. -14, 35.5)
– The end instantiated at position: (18.5, -14, 35.5)
– This indicates that the parent position they are referencing is: (8.0, -14, 35.5)
– Both RopeStart and RopeEnd child objects’ positions matchup with the weird physics object positions as well, so it’s before them.

SOLVED:

Turns out the overall prefab had the exact transform position (8.0, -14, 35.5) so those values were getting passed into everything as the starting parent transform value

Issue 3:

Rope is not actually connected to the physics objects at the ends.

– This is accomplished by setting the connectedBody reference of the RopeStart and RopeEnd objects to the rigid body components of the start physics object and end phsyics object respectively.
– This is happening as seen in the references at run time, which makes me expect that this connection is still somehow ‘ being made before the instantiation of the full pulley setup.

Test 1:

Run everything in Awake instead of Start

– I thought running everything sooner may help set the connection up earlier.

Results:

– There were no noticeable differences.

NEXT STEPS

Figure out how to actually connect the objects to the ends of the rope.

HFFWS Rope Pulley System Issues and Strange Audio Instantiation

October 9, 2019

HFFWS Thesis Project

Creating Pulley System

Creating Pulley in HFFWS

Working with the Rope Script

The Rope script is the central focus for the pulley system, but the Fixed Joint that goes with the rigid body of the ropeStart and ropeEnd also play a crucial role which makes getting everything to work together nicely a bit of a challenge. I want the setup to be able to take in a prefab for each end of the pulley and instantiate those objects in the proper position, and then become connectedBody for each of these Fixed Joints. Similar to other issues I have had before with instantiating objects, there seems to be a critical timing factor needed on top of the fact that the objects just physically behave very weirdly when created.

I think currently there is some collision issue that is occurring because the rope ends up spawning very far away from where it is intended to spawn and also waves around violently. Meanwhile, the objects that are supposed to be at the rope ends are spawning in the correct position. The demolition ball just falls to the ground while the hinged platform moves back and forth some.

The connectedBody reference on the Fixed Joints is something that needs to be done on initialization to work properly, so I have been trying to instantiate the rope end objects first, then setting the prefab’s Fixed Joint connectedBody’s to these objects’ rigidbody’s, and then instantiating that prefab, but this is clearly leading to some significant errors. I will have to try some other approaches where I change the order of events to see if I can get more desireable results, or just understand where the errors are occurring more accurately.

Weird Audio Issue

Weird Siege(Clone) Issue There was a Siege(Clone) object being instantiated at game start. This had lots of audio files. I tracked this to the Level gameObject which has a SoundManager component. This had a Stored State of Siege which I removed. This stopped Siege from instantiating anymore. I am not sure how this got set in the first place (may happen when loading other scenes or checking the prefab scenes). The SoundLibrary component also has a Siege reference in its path: Path = 6Siege. However this does not appear to be doing anything currently.

Pulley Wheel Positioning System – Weighted Ranges for Positioning

October 6, 2019

Pulley Wheel Positioning System

Video Demo of Wheel Positioning System

Demo – Link

By: me


General System Needs

My pulley system needed to create a rope with objects attached to it, as well as objects which act as the pulley wheels which will support the rope. The positioning of these wheel objects must be in line with the rope, but below it. Using the HFF system, the rope gets generated and then falls, draping itself over any objects below it.

Keeping those requirements in mind, I also wanted the system to be able to generate a varied amount of these pulley wheels and place them in varied positions below the generated rope. Having the option for multiple wheels became more important when I noticed that sometimes ropes with heavy objects attached can break through rigid body wheel support objects, but having more (therefore more support) can sometimes alleviate this issue.

So to summarize, I wanted a system that could choose a varied amount of positions along a randomly determined line, with extra rules dictating how far these positions should be from the ends of that line, and how much of a space buffer should be given to each position (so when an object is instantiated at one of these positions, it does not collide with another instantiated object).

Starting Off

To keep the system simpler for now, since the system needs to fall into place anyway, I was specifically randomly generating the rope on the xz plane at some height y. The wheel positions are then generated on basically the same line, but some distance below that line (to ensure the wheels are within the rope line, but below for the rope to fall on them).

Adaptive Range System

The difficult thing with this position range system is that choosing a position for an object removes a specific range around that position to account for the space needed to instantiate an object at that position. Because of this, I needed a system that could update the range options everytime a position was chosen. I came up with a system that could determine how to update the ranges everytime a position was chosen, and could also determine if a range needed split into multiple.

The first range is the easiest to determine. It is just the full range of values between the beginning and the start of the wheel positions, with a buffer at each end factoring in the value for distanceFromEnds that we want to give to keep objects from instantiating too close to the ends.

With this first range created, we choose a random position within this single range. After that is when the adaptive range system comes in. Depending on the position selected, there are several possible options to account for the options that have been removed from the range:

  • If the position is sufficiently far away from any other range bounds, a range is effectively split in two.
  • If the position is very close to both the min and max bounds of the range, that range is fully removed.
  • If the position is very close to either the min or the max bound of the range, that range can just be modified.

Weighting the Ranges

One issue with a system that creates multiple ranges is that these ranges can be different sizes. So if at some point in the process I am randomly selected a range first, to then select values from, each range will inherently have the same chance of being selected, regardless of its size. To remedy this, I used a weighting system.

Each range has a weight in the range (0, 1] (The minimum bound is exclusive, as nothing should ever have a weight of 0, but the maximum bound is inclusive since if there is only 1 range it is the only option) representing how much its individual range covers amongst the total coverage of all the ranges within a list of ranges. This is easiest to explain with an example:
We have 3 ranges: (0, 2] (2, 5] (5, 10]
The total range coverage is: (2 – 0) + (5 – 2) + (10 – 5) = 10
The individual weights for these ranges are then:
Range 1 (0, 2]: Weight = (2 – 0) / 10 = 0.2
Range 2 (2, 5]: Weight = (5 – 2) / 10 = 0.3
Range 3 (5, 10]: Weight = (10 – 5) / 10 = 0.5

So when we go to select a range, we randomly roll a number in the range of (0, 1] and use this to determine which range to pull a value from. This works by checking if the rolled value is less than or equal to the first range’s weight. If this is satisfied, that is the range to choose from. If not, it moves to check the next range’s weight. To fit this within this (0, 1] range, each time a range is not used, its weight is added to a pool to add to the next range’s weight. This helps move the weight check along the range of (0, 1] with many values significantly below 1.

To follow the previous example to show this in action:
Our randomly rolled value to select a range is: 0.75
General Formula:
Check range n: Is rolledValue <= (rangenWeight + weightCheckPool)? No, add rangenWeight to weightCheckPool
Check range 1: Is 0.75 <= (0.2 + 0)? No, add 0.2 to weight check pool and move to next range
Check range 2: Is 0.75 <= (0.3 + 0.2)? No, add 0.3 to weight check pool and move to next range
Check range 3: Is 0.75 <= (0.5 + 0.5)? Yes, use this range to select a value from
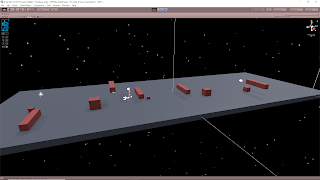
HFFWS Framework for Pulley Puzzle Generator

Pulley Puzzle

Thesis

– Basic setup
– Objects attached to both ends of a rope
– Rope hangs over something

– Setting Up First Basic Instance
– Ropes
– these are very touchy in HFF
– they usually use a setup where there is a start and end transform position, and several
rope segments get instantiated between these two points to produce a “soft body” object
– need to make sure neither of these points is deeply within another rigid body object,
or physical interacting object as this can lead to a constant state of colliding
– constant colliding causes the rope system to act erratically on its own
– Attaching a Physics object to both ends of a rope
– the original rope objects use a physics object at one end, and a fully fixed positional
object at the other end
– we need both ends to use a physics object
– This is done by:
– Making sure both objects are rigid body objects
– In the Rope script:
– Make sure to assign “Start Body” as one object, and “End Body” as the
other object
– Using “Copy_YellowMetalMechMediumCradledPlatform2” as other physics object
– this prefab initially has a hinge joint attached to it
– there is something about this that fixes the entire platform in place
– removing this allowed it to work as intended
– I dragged the reference of this main object in as the “Connected Body” for the Fixed Joint
component on the RopeStart gameObject in the pulley setup
– Issues
– I was using “Copy_YellowMetalMechSmallWinchSpool1” as the central wheel for the pulley setup, but sometimes the rope would break through it
– Appeared that such massive objects can cause the rope to clip through this sometimes
– I alleviated this by having the rope go over two winch spools (similar to the setup found
in the Demolition level)
– this also broke through one of them eventually while I was increasing the mass of the ball in Play mode to see if I could raise the platform

– Constructing “Create Pulley” script
– Needs:
– Rope
– Physics object at each end
– Total: 2
– Pulley wheel object
– Total: >= 1
– Parameters (words)
– Rope
– Length
– Start Point
– End point
– Physics objects attached
– Type of objects
– Mass
– Start point
– End point
– Wheels
– Quantity
– Position
– Important Relationships:
– Wheel(s) must start below the rope
– Must be on a similar plane, but lower on Y position
– End position must be “length” away from start position
– Length = End Position – Start Position
– This can be done with using Random.OnUnitSphere to pick a random
direction in 3D space

HFFWS Modify Prototype to Handle Building Multiple Scenarios

September 20, 2019

Furthering Prototype

Level Generator

Prototype Enhancement

Allowing for Multiple Scenarios to Be Created at Once

This started as a thought for just generally helping with testing the classes to see if they were working properly, but then it seemed like it could just be a powerful addition to the system in general so I decided to implement it more properly into the system. The basic idea was simply adding a “Test Counter” which I could adjust to create a number of instances of the generic scenario I was generating.

The idea was that this would let me see more instances of the variance the system has at once, so I could more quickly test if it seemed like the system was working or not. This also helps give me a better picture of the overall variance the system has as well, so it was actually more helpful than I first realized.

I have also dabbled in machine learning (ML) and a key portion of using that is creating several test environments to more quickly train your system or agents. This gave me more motivation to look into changing my variables into array sets to deal with the idea of multiple puzzle scenarios (which could potentially later feed into how to get this setup for multiple testing environments for ML).

At the root of everything, the system is doing very similar work to what it was doing previously. I have just added several for loops and changed some variables instances into arrays to allow the overall system to deal with several puzzle instances at once. Holding all of this information in arrays could also be beneficial for printing out the data somewhere to keep better track of what works and doesn’t work with the system at any given time.

Example Image and Video

Example View of 5 Generated Puzzle Scenarios – By: me

Vimeo – Example Iterations of Scenario with a Test Run with a Character

Link – Test Example with Gameplay

GENERAL NOTES

I just wanted to make sure to note some other factors I ran into with some more testing. The mass of the TestCubes that needed carried around to reach the ledges ended up settling on 120. That was a value I found to be fairly easy to move around, but not so light that the cubes would topple over often (especially the smaller ones).

Currently the GenerationSystem has an array that holds all of the ledge height values passed in from every generation of a ledge, so that can be fed to each properly indexed cube for scaling purposes. However, because I am passing that information on Awake, I was unable to set the size of that array equal to the number of tests (as it should be), because even doing so in Awake was not being done in time. I tried setting the size of the array directly on variable declaration, but I want to be able to control the number of tests to create from the inspector so the array size comes from a serializeable field in Unity. I could not use this to declare my array size in the class’s general declared variables. So for now, it is just hard coded at some decently large array size (like 10) until I find a better solution.

NEXT STEP

I would still like to test this setup with a more complicated puzzle scenario, as this simple one is already helping me see a lot of possibilities and flaws that will need adjusted.

HFFWS Building Prototype Setup

September 19, 2019

Building Prototype

Level Generator

Prototype Frame

The idea of this prototype design is simply to show the general concept of the final hoped for result of my thesis project. It will cover the core concepts of: creating the proper objects for a puzzle type, varying parameters of those objects, communication between objects.

This prototype will be a very simple puzzle. It will simply be an elevated ledge that the player must be able to climb up onto by using a block in the environment. This will demonstrated the concept of tying specific object types to a puzzle type (connected the instantiated block to an elevated ledge puzzle). It will have varied parameters by varying the position of the ledge (most notably the height) and the size of the block. Finally, the system demonstrates communication between objects by using information on the ledge’s position to control the range of the block size.

PROTOTYPE CLASSES

Class: Generator System

This class was created with the purpose of receiving data from all the individual creation classes which would be important for communicating with other creation classes. Information that a class needs to receive from another to inform how it should generate or instantiate objects should all be compiled here for other classes to pull from.

Class: Create Ledge

This is a small example of a creation type class which simply instantiates a ledge. The ledge is just a long box object. A range for its position, most notably its height, can be input by the designer. This class then instantiates the ledge somewhere within this range, and then passes the height information to the GeneratorSystem class.

Class: Create Box

This is another small creation type class, but this one exemplifies receing information from the GeneratorSystem as opposed to passing information to it. Its main function is just instantiating a box object. This class has ranges of inputs for the position of the box in 3D space as well. It also has a range determining what scale the box object should be instantiated at. This scale range however, uses information from the GeneratorSystem to see if it needs adjusted, and adjusts accordingly.

Just to show the general concept, the minimum scale that is given to this class will adjust based on how high the platform is instantiated. This is to ensure that the box is at least big enough to allow the player to reach the ledge, regardless of height (theoretically). There is also a max scale limitation which is just a fixed value to be put into the GeneratorSystem, which is there to make sure the box isn’t so big that the player cannot climb onto it in the first place.

Concept for General Flow

There needs to be a flow where all values that can be determined before instantiation are found and passed into the GeneratorSystem. This then needs to be followed by classes accessing this information (if they need other class information before determining some of their own values). Finally, the creation classes should all have the information they need to proceed and generate the puzzle scenario.

Testing Flow

I initially tried having each of these classes set static references of themselves in Awake in Unity, then pass information to GeneratorSystem in Awake, and finally grab values from GeneratorSystem in Start before instantiating at the end of Start. This however had an issue where the instances weren’t all being set in Awake in time to also pass values within it (between several classes). Basically, the small public GetInstance methods were being called before the instance in GeneratorSystem was actually set.

As a temporary fix, I simply changed the GeneratorSystem references within each seperate class into a public variable so I could just set them in the Unity inspector. This ensures that they are taken care of before anything else. This solved that problem, and could actually be a fine solution avenue as long as separate scenes are not needed.

GENERAL NOTES

This practice was helpful for visualzing the process I want to achieve, as well as getting started on figuring out the basics of how the individual classes should be setup to build this process. I am already starting to see repeated patterns that may be better suited with parent abstract classes or interfaces if I continue this route of just having many creation classes and one general GeneratorSystem class. That may also be helpful in the future for having GeneratorSystem find/store/etc. all these different classes.

This exercise has also helped me start to identify what values and variables may make sense to have the final product system determine on its own. For example, maybe the system could figure out on its own how much shorter the box can be than the ledge while still allowing the player to complete the level. Similarly, maybe it could determine the maximum size the box can be to allow the player to still climb onto it.

With this very quick and simple test, the objects did spawn inside of each other sometimes. This was noted as something I would have to look into at some point previously, so I am just reiterating.

NEXT STEP

Test this prototype out some more to get a feel for how this system works, and what fine tuning I can do to make it work a bit better. This will also help me get a better idea for the general framework of some of the classes I may need to make, and what higher level parent classes or interfaces I can make that can serve as the foundation for some of these creation classes.

This can also help me get a better understanding of how the data flow should work, and whether that should be switched around to any degree. This general framework was made with the intention that individual creation classes would contain the individual methods needed to adjust their personal ranges and needs, but maybe it could make more sense to do more work with the overarching GeneratorSystem class.