HFFWS Prototype Setup

September 18, 2019

Setting Up Prototype

Level Generator

Prototype Frame

The idea of this prototype design is simply to show the general concept of the final hoped for result of my thesis project. It will cover the core concepts of: creating the proper objects for a puzzle type, varying parameters of those objects, communication between objects.

This prototype will be a very simple puzzle. It will simply be an elevated ledge that the player must be able to climb up onto by using a block in the environment. This will demonstrated the concept of tying specific object types to a puzzle type (connected the instantiated block to an elevated ledge puzzle). It will have varied parameters by varying the position of the ledge (most notably the height) and the size of the block. Finally, the system demonstrates communication between objects by using information on the ledge’s position to control the range of the block size.

Unity – Testing Collision on Instantiation for HFFWS

September 17, 2019

General Testing

HFFWS

Rigidbody Collision on Instantiation

Since having the system place objects itself is an eventual goal of my project, I wanted to see if rigid body gameobjects with colliders would collide immediately with each other if one was instantiated within the bounds of the other. I also wanted to check with collision checks would work best (or at all) for this, between OnEnter, OnExit, Stay, or anything else I could find.

To test this, I placed a cube (with collider and rigid body component) in the virtual space in the editor, and an empty gameobject that would be the TestSpawner at the same transform location. The TestSpawner simply instantiated an input gameobject at Start. This object was a simple sphere that had a collider and rigid body component. I think created a CollisionDetector script that I placed on both of these objects. This just had methods for OnCollisionEnter, OnCollisionExit, and OnCollisionStay to return a debug.log stating the name of the object itself and what it was colliding with, with information on which method it used to detect this collision.

The test did work as expected. They both immediately called OnCollisionEnter detecting each other, then had many OnCollisionStay calls as they stayed collided/near each other. Since the objects cannot occupy the same space, they did displace each other, which will be something I will have to monitor in the future. I am not sure if this will be an issue, but depending on how precisely objects need to be located in their original positions, this could cause some issues. I may need something that can detect an impending collision and stop an instantiation process before actually displacing the existing object.

HFFWS – Further Testing Modifying Prefabs Before Instantiation

September 12, 2019

HFFWS Prefab Editing and Instantiation

Testing

TESTING

  • How does altering prefab directly affect process of creating multiple instances?
  • Can altering prefab help set the axis of moving platform?
Can altering prefab help set the axis of moving platform?

Yes, this approach worked. Setting the axis rotation on the prefab directly, THEN instantiating instances of the prefab had the platforms move in the newly set direction.

How does altering prefab directly affect process of creating multiple instances?

This does not appear to have any effect on previously instantiated instances of the prefab. Once an instance is created, changing the parameters of the prefab was NOT changing those parameters for the already instantiated. This gives more support to using this approach

FINAL NOTES

These tests do give this approach more support in being the one to use for now, since it does seem to accomplish all of the goals necessary at this time. It still makes me nervous that the prefab itself gets changed in the editor everytime play is run, and it can impact editor-set prefab instances, so I will continue to check in on different methods for instantiating objects as I move forward.

HFFWS – Instantiating Conveyor Belt

September 10, 2019

Human Fall Flat Workshop

Conveyor Instantiation

Today we are finally going to try setting the parameters of a conveyor object on instantiation and seeing which we can and cannot, and trying to fix as many that we cannot as possible. We will also use this as a comparison point for the vertical moving platform generator to start designing the foundation of a tool that can instantiate many different types of objects. At the very least, it could potentially lead to the start of an interface or an abstract class that can be used as the base for classes that instantiate objects.

Parameters to Set on Instantiation

  • Item Prefab
  • Segment Count
  • Length
  • Radius
  • Speed

TESTING

Test #1:

ISSUE: Want to properly set some conveyor prefab parameters on instantiation.

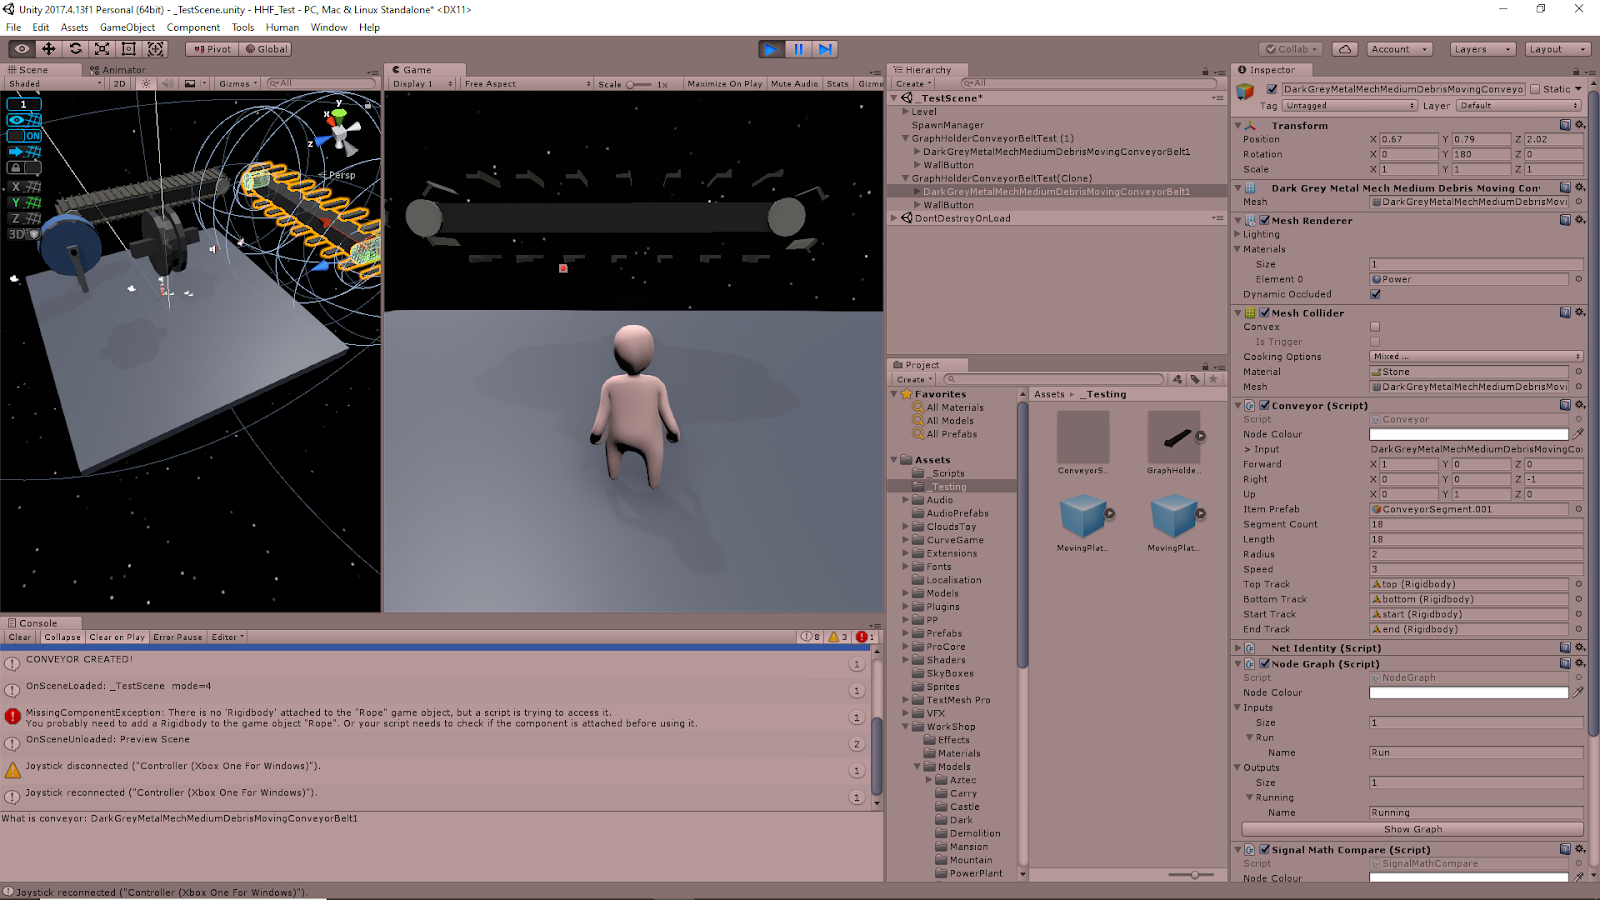
Using a similar start to creating the platform prefabs, my first attempt to instantiate these conveyors began with instantiating the conveyor prefab and casting that as a gameObject. As most of the parameters are found in the Conveyor script in one of the children objects of this prefab, I simply created a Conveyor variable reference that used a GetComponent. I then set all the parameters of this conveyor reference with public variables available in the inspector: segmentCount, lenght, radius, speed.

FAILED: The script was returning an error as soon as it tried to set the first parameter (segment count). This made me think that maybe just using GetComponent to get the Conveyor reference was not working. I thought GetComponent looked through children objects if it didn’t find anything in the initial object, but that may not be the case.

Test #2:

ISSUE: Get prefab reference to actually set conveyor parameters on instantion.

I am changing the GetComponent to GetComponentInChildren to see if specifying that initially helps properly grab the Conveyor reference I need. I am also adding a debug.log to check the name of the reference I am getting in hopes that this will help me check what it is getting (if anything).

SOLUTION: This did fix the problem of getting the reference and actually setting the values, however, this was not creating a conveyor with the proper initialized conditions. The values were being set, but the parameters that need to be set at instantiation to work (like Lenght and Segment Count) were not being received in time.

Test #3:

ISSUE: Parameters being set, but instantiated prefab is not using those set parameters. It is using the default prefab values.

With some very quick checking, I decided to look into issues with changing prefabs and instantiating them and it very simply led me to find that I can just change the prefab parameters itself before instantiating an object. This seemed like a very obvious solution that I hadn’t tried yet apparently, so I simply did just that: I simply had my Conveyor reference variable grab that of the input prefab itself, set all the parameters, and then just instantiate that prefab (without the casting to gameObject addition).

SOLUTION: This immediately worked. The length, radius, and segment count were all set to the inspector values and actually reflected in the instantiated conveyor. It should be noted however that this effect of altering the prefab carries over into the editor AFTER EXITING PLAY MODE.

Images of Prefab Default versus Parameter Altered Instantiation (Conveyor)

Conveyor – Default Prefab
Conveyor – Parameter Set Instantiation

NOTES:

It is very important to note the final effect of editing and instantiating prefabs this way. You are directly modifying the prefab itself, which can have some undesirable effects. At one point, I had an example conveyor in the scene to compare with, and it took on the same parameters of my conveyor spawner after running, ending, and running again, since it must have been using a default prefab reference of some kind. That prefab itself had its values changed (which again, carries over into the editor even when LEAVING PLAY MODE), and my other scene reference to that prefab just took them on as normal prefab changes.

To further test this, I edited the values in the existing prefab instance in the scene slightly, and further play tests did NOT reset this existing prefab reference. I played, closed, played again, and it stayed with the same set values. So it appears any alterations are making it into its own object, where as if you simply drag/drop in a prefab, altering the prefab this way can change how those objects will start up in the future.

Further testing showed that any values directly set to the existing prefab reference in the scene will always stay that set value, but running the game will still cause other parameters that haven’t been altered to change to those dictated by the script. This impact can “lag a play behind” as well. For example, I set the segment count in the existing prefab object to a different value, so playing kept all the parameters the same (even those I had not altered), however, upon playing a second time, those other parameters WERE altered to the values dictated by the script (where the editor set parameter still remained as it was set).

Video of Issue

Vimeo – Video Link

By: Me

The two main ways around using the system this way that I can see are:

  • 1: Always setting the parameters of existing prefabs in the editor that will be affected by scripts
  • 2: Create two seperate prefabs: One for using pre-made instances in the editor and one that can be taken by a random spawner and altered

All of this shows that editing the prefab before instantiation may not be the best solution, and it may be worth looking into other techniques if available.

NEXT STEP

I want to randomly instantiate a few conveyors to make sure the system of setting up random ranges for values works just as well with this as it did for the moving platforms. I would also like to experiment with replacing the meshes with various other mesh objects (for example, instantiating the conveyor segments randomly from a predetermined list of mesh options).

HFFWS – Working with Conveyor Belt

August 29, 2019

Human Fall Flat Workshop

Conveyor Parameters

Conveyor Parameters

Name: DarkGreyMetalMechMediumDebrisMovingConveyorBeltBody

  • Parent
    • Mesh
      • the mesh of the overall body of the conveyor belt; the central element
      • Default: DarkGreyMetalMechMediumDebrisMovingConveyorBeltBody
    • Conveyor (script)
    • Item Prefab: objects that the belt is made up of
    • Segment Count: creates the designated number of segments; spread out accordingly
      • Initialized
    • Length: Changes the overall length of the conveyor
      • Changes during Runtime, but only properly works in setup
    • Radius: this is the radius of the curved ends; controls overall thickness of belt system
      • Initialized
    • Speed: Direction and how fast the belt moves around
      • Runtime
    • Node Graph (script)
    • Signal Math Comparte (script)
  • BeltM_RollEnd
    • Just seems to be model for cylinder at a belt end
  • BeltM_RollStart
    • Just seems to be model for cylinder at a belt end
  • ConveyorSegment.001
    • This just seems to be the default prefab reference for the object that makes up an individual conveyor segment
    • This does not need to be a child of the overall object, so it can be removed
    • Just the reference to this object is needed in Conveyor script’s Item Prefab
    • Make sure to have a reference to this if removed to use still
  • LoopingSFXStart
    • Controls starting the audio
  • LoopingSFXStop
    • Controls stopping the audio
  • ConveyorLoop
    • Another audio source for the general audio produced by the conveyor
  • top
    • Instantiated at runtime, holds segments making up the top part of the conveyor
  • bottom
    • Instantiated at runtime, holds segments making up the bottom part of the conveyor
  • start
    • Instantiated at runtime, holds segments making up the curving side of the conveyor
  • end
    • Instantiated at runtime, holds segments making up the other curving side of the conveyor

NEXT STEP

I have worked out a lot of what the parameters do, now I just need to test setting them and instantiating conveyors at run time to make sure that works as I expect.

HFFWS Finding Objects to Test

August 27, 2019

Human Fall Flat Workshop

Instantiating More HFFWS Prefabs

I ended up running into an issue testing the HFFWS. When in Play mode in the Unity editor, my player model was missing.

PROBLEM: Missing Player Model in HFFWS Unity Editor

SOLUTION: I decided to open HFF to see if there was a direct access to the workshop levels from the main menu, and found out there was not. While I was in the main menu, I decided to have some fun and customize my player model. After doing so, I found out that my player model in the HFFWS editor was missing. It turns out that the editor tries to use your in game model, and if you are not using the “Default” as the option for your character’s model, nothing will show up. model

The Prefab scenes seem to work pretty well from interacting with them for a bit. I will look to go through these and grab some interesting objects to run some spawning tests on to make sure I find a nice way to approach this. Setting the parameters for node and non-node objects will be crucial for setting up levels.

NEXT STEP:

A decent looking prefab I will look to work on next time was the GraphHolderConveyorBelt from the PowerPlant prefab scene. It has a good bit of factors for running a large conveyor belt, which could also just be a useful tool for me to work with in the future.

Instantiating HFFWS Platforms with Parameters Determined in Script

August 23, 2019

Human Fall Flat Workshop

Instantiating Moving Platforms with Varied Parameters

Goal: Instantiating various HFF prefabs with varied parameters determined in script
– Should be able to work with multiple prefabs or provide a base foundation that can make further scripts which can work with
other prefabs
– Should be able to work with the signal and node system of prefabs
– Should also work with more standard values (basic Unity components)

CreatePlatforms Test

– This script focuses on working with the MovingPlatformVertical prefab
– It seems that using initialValue works to set values in the node system for this object when doing it upon instantiation
– Need further testing to determine the difference between value and initialValue and when to use both
– Interesting components and values to check:

The components for MovingPlatformVertical that we need access to are:
– Parent
– Mesh Renderer
– Mesh Filter
– Mesh Collider
– Signal Math Mul (Script): In 2
– Children (Axis)
– Transform (Rotation: X and Y)
– Linear Joint
– Max Value
– Max Speed
– Max Acceleration

– Tests:
– 1) Try assigning various parameters all throughout the prefab to see which work and which don’t
– I used the following code to set a bunch of various values of the instantiated prefab through script:

private void GOInstantiatePlatform()
    {
        GameObject newPlatform = (GameObject)Instantiate(movingPlatformPrefab);

        newPlatform.GetComponent<SignalMathMul>().in2.initialValue = input2Param;

        newPlatform.GetComponentInChildren<LinearJoint>().maxValue = maxValueParam;
        newPlatform.GetComponentInChildren<LinearJoint>().maxSpeed = maxSpeedParam;

        axisChild = newPlatform.transform.GetChild(0).gameObject;
        axisChild.transform.localEulerAngles = new Vector3(12.2f, 35.5f, 12.5f);
    }

– Many of the components I wish to alter are not using the node based system and were easy enough to set as pretty standard
Unity component values
– Setting these did change the values on the instantiated prefab, but they did not seem to impact the actual platforms
– For example, even though the axis was rotated at a different angle, it continued to just move up and down
– It appears the platform’s behavior is using its base prefab values before having the values set by the script
– UPDATE: Editing the LinearJoint params in script seems to work for instantiation as well
– It is specifically the Axis rotation that is not being properly followed

– 2) Try assigning values to an existing object through script
– See if this allows an object to operate based on scripted values
– This did not work either
– At least the axis alteration clearly does not work
– EDIT: This did work on the LinearJoint parameters
– it takes on the scripted values then uses those to drive the platform
– doesn’t use the Unity editor set values

– 3) Add script directly to Axis object to change rotation at Start
– Code:

private void Start()
{
RotateThis();
}

private void RotateThis()
{
transform.localEulerAngles = rotationValue;
}
– this also did not work
– still properly sets value, but platform uses original values to move

– 4) Try Test 3, but on Awake instead
– Code:

private void Awake()
{
RotateThis();
}

private void RotateThis()
{
transform.localEulerAngles = rotationValue;
}

– This actually worked! The rotation was set and the platform followed the new rotation

– 5) So try running the instantiation method of the platform in Awake
– this did not work
– similar outcome, values were edited but it did not follow the new axis

– 6) Set Axis rotation by using the LinearJoint Axis reference instead
– did not work
– similarly changed value, but did not have platform follow it

Thoughts for Further Tests:

– Might be worth seeing if this Axis is fed into the Signal system of the platform prefab main parent object
– Could be something where once it’s set in the Signal system, it’s set for the platform’s life
– Maybe could prevent this reference from happening until the Axis rotation is properly set

– Could be the LinearJoint reference for Axis that takes in the Axis transform
– this may get set once initially at Start and never be looked at again
– TESTING
– 1) Removing this reference at run time
– didn’t do anything
– platform kept moving as it was
– supports that this is just used once to set initial direction
– 2) Removed reference before playing in editor
– immediately grabbed a reference to the Axis transform anyway
– appears to be scripted to grab its own transform on Start
– POSSIBLE SOLUTION:
– could possibly use this by removing the LinearJoint on the prefab, so then we could set the
Axis transform and then add the LinearJoint so it would take on the Axis transform after being edited
– 3) Removed LinearJoint component from prefab, then in script, edited Axis transform, then added LinearJoint component,
then set the LinearJoint values
– This setup the object correctly (components were in the right place) but the platform did not move
– The LinearJoint did not take on the Axis transform automatically as assumed, and it was also missing the parent object
reference as the body to move
– Next: try setting those references manually in script as well
– 4) Tried adding LinearJoint with script as well as setting more values in script
– added the axis transform and the parent body object manually
– still did not move

– NOTES:
– from testing, found that editing LinearJoint values such as minValue, maxValue, maxSpeed, maxAcceleration at run time even work,
so it makes sense they were working sooner as they appear to be fine to edit at any time

HFFWS Object Instantiation and Setting Their Node Values

August 13, 2019

Human Fall Flat Workshop

Instantiating Objects with Nodes

Youtube – Moving Platform Tutorial in Unity for Human Fall Flat

By: Gotcha McFee

I just wanted to reference this tutorial again as this is how I got the moving platform in the first place for HFFWS. This also shows why I am interested in the specific components and their values when instantiating the object. This object also has a lot of node graph involvement, which is a big part of HFFWS in general, so it shows why being able to control their values in script is so necessary.

Creating Object Spawner

I wanted to create a script that could take some of these HFFWS prefabs and start spawning them with various values for their variables to see if I could produce varied objects in real time in the game.

This script needs to be able to:

  • Take a prefab reference
  • Access certain components (or children’s components)
  • Access the parameters of the components(s)
  • Randomly set them (within a given threshold)
  • Create instances of the prefab with these given values

The components for MovingPlatformVertical that we need access to are:

    Parent

  • Mesh Renderer
  • Mesh Filter
  • Mesh Collider
  • Signal Math Mul (Script): In 2
    Children (Axis)

  • Transform (Rotation)
  • Linear Joint
    • Max Value
    • Max Speed
    • Max Acceleration

It turns out SignalMathMul and LinearJoint are both part of the HFFWS .dll file. You can gain access to these classes in script however with the namespace “HumanAPI”. So at the top of your Unity C# script, you just need to add “using HumanAPI” to reference this namespace to create variable references for these classes.

The next issue I ran into however was attempting to set node values within script. SignalMathMul uses the node system, and I wanted to change the In 2 value of this component in script. By creating a variable reference for a SignalMathMul object, I saw there was simply a variable I could access within it called “in2”, which seemed like the variable I was looking for. Trying to set this as a float, I got an error telling me this was actually of type NodeInput. After creating this object, I looked at the methods and variables available and found one simply called “value”. So I tried setting the value of my number NodeInput to 0.5f, and then setting this signalMathMul.in2 to number (in an attempt to set the input 2 value of the signalMathMul component to 0.5f) but this just resulted in 0 at run time.

TESTING

I think that something with the whole Net Body setup may be causing issues, as this may not like values of these components being set at run time. This may be causing some value discrepancy for a very brief moment that when the networking system sees it it just defaults values to zero.

Initially, I was trying to instantiate a new moving platform with the given SignalMathMul values. I then tried to just alter the values of an existing in scene platform with the script. This also appeared to fail at first, as the inspector showed a value of 0 again. With further testing, this setup does appear to actually set the internal input node value. This change is not reflected in the Unity editor, but when play testing it did change the behavior of the platform. Upon further inspection in the node graph, it could also be seen here that the value was actually being set to that given in the script. I then went back to use the exact same setup but with instantiation again, and this did not work still. Again, this just set the input to zero. I checked in play mode in the updating node graph, and this confirmed it was actually set to a value of zero.

I then tried instantiating the object, and then changing its input values. This created an instance of the prefab with its default values just fine. The platform was moving properly. This however did not update the platform values with the scripted values.

SOLUTION

Since none of these approaches with setting in2.value to a number were working, I checked the methods and variables available again and saw there was also an initialValue variable for the Node Input class. I then tried setting in2.initialValue instead with my instantiated platform and this worked as intended. The value was properly set (in editor as well as in the node graph) and the platform’s moving behavior changed accordingly. The resulting script looks as follows:
public GameObject movingPlatformPrefab;
private SignalMathMul signalMathMul;
private LinearJoint linearJoint;

private void Awake()
{
GOInstantiatePlatform();
}

private void GOInstantiatePlatform()
{
GameObject newPlatform = (GameObject)Instantiate(movingPlatformPrefab);

newPlatform.GetComponent().in2.initialValue = 1.2f;
}

I left the extra component references in for later if I need them, and I was doing the instantiation in Awake through testing in case spawning it “later” was doing something weird with the networking scripts. I tested running it in Start instead and this also worked just fine.

HFFWS Moving Platform Tutorial

August 13, 2019

Human Fall Flat Workshop

Moving Platform Tutorial

Youtube – Moving Platform Tutorial in Unity for Human Fall Flat

By: Gotcha McFee

To start, they just went to the IntermediateLevel 1 scene to grab a copy of the moving platform prefab from there. They just placed this in a prefabs folder to use later.

This moving platform has a ton of script components on it, but the main one they focused on was called “Signal Math Nul”. Changing the second input value here changes how quickly the moving platform changes directions. A high value will make it go back to start very quickly, where a low number will take longer (and if it’s low enough, it will actually wait at the end point for some time before coming back).

Next, they showed that the child object, Axis, controls a lot about how the platform moves. By rotating this object, you can change the direction the platform moves. The other simple variables they show are:

  • Min Value: Normally just keep at zero
  • Max Value: Changes how far platform can move in given direction
  • Max Speed: Changes the top speed the platform can accelerate to
  • Max Acceleration: Changes how quickly the platform changes speed

These variables are pretty self-explanatory, but there are a few issues to note with them. Going back to the first problem where a platform that changes directions too quickly won’t even reach its maximum value, this needs to be checked when you change a platform’s Max Value. If you change this without giving it more time to change directions, it may not be ending up where you would plan on. Max Speed and Max Acceleration are values that need tested in game as they will contribute force and momentum to players that are on the platform. Having too high of values here can throw players off the platform and make it difficult to stay on.

Finally, they show that you can take this underlying foundation and place it on any object to make it move around. They child a new object to this entire setup and just turn off the old mesh components, but it’s actually easier to just change the base platform object’s Mesh Filter and Mesh Collider to the object you want (and then update the Mesh Renderer to fit this new mesh). This lets you use any mesh as a moving object.

Setting Up HFFWS Project

August 9, 2019

HFFWS

Setting Up Initial Project

Youtube – Human Fall Flat – How to make a map – Ranul

By: Ranul

So following this tutorial, the bare minimum for getting a level started is simply adding the “Level” prefab into your scene. This comes with:

  • InitialSpawnPoint: where the player spawns in; even has an indicator with a ray to show exactly where they will hit
  • FallTrigger: this is the trigger that determines when the player should be respawned
  • PassTrigger: the trigger for finishing the level (the goal)
  • Directional Light: standard directional light

It also sounds like “everything” needs to be childed to this Level prefab, so I’ll stick with that until I find otherwise.

Thrower Tutorial

Youtube – Spinning Thrower + Space Unity Tutorial for Human Fall Flat Workshop

By: Gotcha McFee

This tutorial shows how to use some basic tools that Probuilder affords you in Unity to make a moving, interactable object in your HFF level. This specific object is a “Thrower”, which is a spinning wheel that the player can hold onto then release to get launched to a new area from the wheel’s momentum.

Notes that the mass of objects makes a big difference in HFF in general, so modifying this can help if you aren’t getting the desired results. Generally objects start with a rigid body mass of 1, but in this example they set the wheel to a mass of 500. This significant difference shows you should be careful keeping track of your object masses so you don’t get issues just because you missed a very low mass value.

There are some notes on how to make a Probuilder object into a moving and interactable object in HFF. To allow it to move, there is an Entity Type under the Pb_Entity component that must be changed to “Mover”. To allow it to then be interactable, the Mesh Collider component needs to have the Convex option turned On. I noticed you could still interact with the thrower holders (just long cubes on the sides of the wheel) without changing anything, so it seems the Convex option is only important for moving objects.

Noted important factors for a wheel object:

  • (If Probuilder object) Pb_Entity – Entity Type – Mover
  • (If Probuilder object) Mesh Collider – Convex (On)
  • Hinge Joint component (automatically adds Rigidbody component)
  • Hinge Joint – Axis (Ex. 0, 1, 0)
  • Hinge Joint – Use Motor (On)
  • Hinge Joint – Motor – Target Velocity (Ex. 175)
  • Hinge Joint – Motor – Force (Ex. 500,000)
  • Rigidbody – Mass (Ex. 500)

Rope Tutorial

Youtube – Rope tutorial in Unity for Human Fall Flat

By: Gotcha McFee

This shows how to create a simple rope in the HFFWS from scratch.

The main objects needed as children objects of your overall rope object are:

  • Start
  • End
  • Rope

The Start and End are just Rigidbody objects with certain masses and constraints (want the start to be more solid and fixed where the end is more manueverable and flexible). The Rope holds a lot of the inner workings of the rope object.

Components needed for the Rope object within the overall rope hierarchy:

  • Rope (Script)
  • Mesh Filter
  • Mesh Renderer
  • Net Body (Script)(which has Net Identity attached as required component)
ISSUES

The tutorial shows how to add some objects like spheres and cubes to the rope object to give it an attachment point at the top and interactable objects at the end. I just wanted to quickly test adding the objects to hold onto on the end of the rope, so I just added a sphere as a child of the end and tried running the game. This caused the rope to glitch out and jump around violently. It appears that adding an object that has too much “rope in it” causes some weird collisions that just make everything move around erractically. I was able to get similar results to the tutorial by moving the sphere a bit below the end transform (without completely removing it visually from the end of the rope). This is just something to be aware of if adding to your rope.

PARAMETERS

The tutorial goes over some of their experience with the parameters of the rope script and results that have and have not worked for them.

Rigid Segments:
Having too many of these makes the rope too “heavy” and hard to use. You can change the individual segment weights as well, but too low of a segment mass causes the rope to “break” and become very glitchy. They generally make normal ropes have about 6 or 7 segments, with 15 being about the max for a very large rope.

Segment Mass:
The default value for this is 20 and that seems to be a pretty nice standard value. As mentioned previously, very low values break the rope and cause it to function incorrectly. The 15 to 20 range seems to be pretty consistent, but just make sure to test ropes with varying mass values if you are getting strange results.