HFFWS Thesis: Hand Built Lever Puzzles to Learn From

April 16, 2020

Hand Building Puzzles

Thesis Project

Intro

Following hand building the ramp puzzles to learn from for my thesis project, I have built lever puzzles to continue the process.

Current Hand Made Ramp Puzzles

As stated previously, this section was about creating the lever puzzles this time around. The main ideas behind them in order are: testing ramps, lift heavy object, build a lever system, launch a projectile, jam lever, and cantilever.
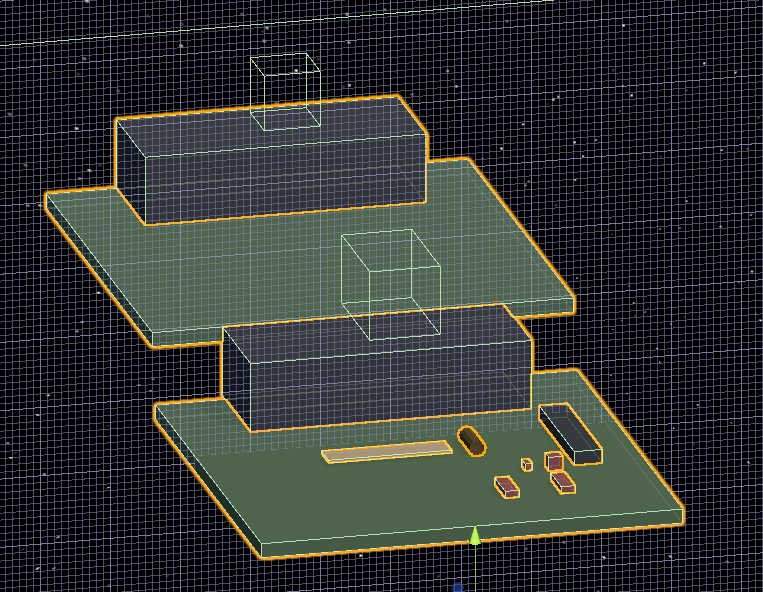
Puzzle 1: Testing

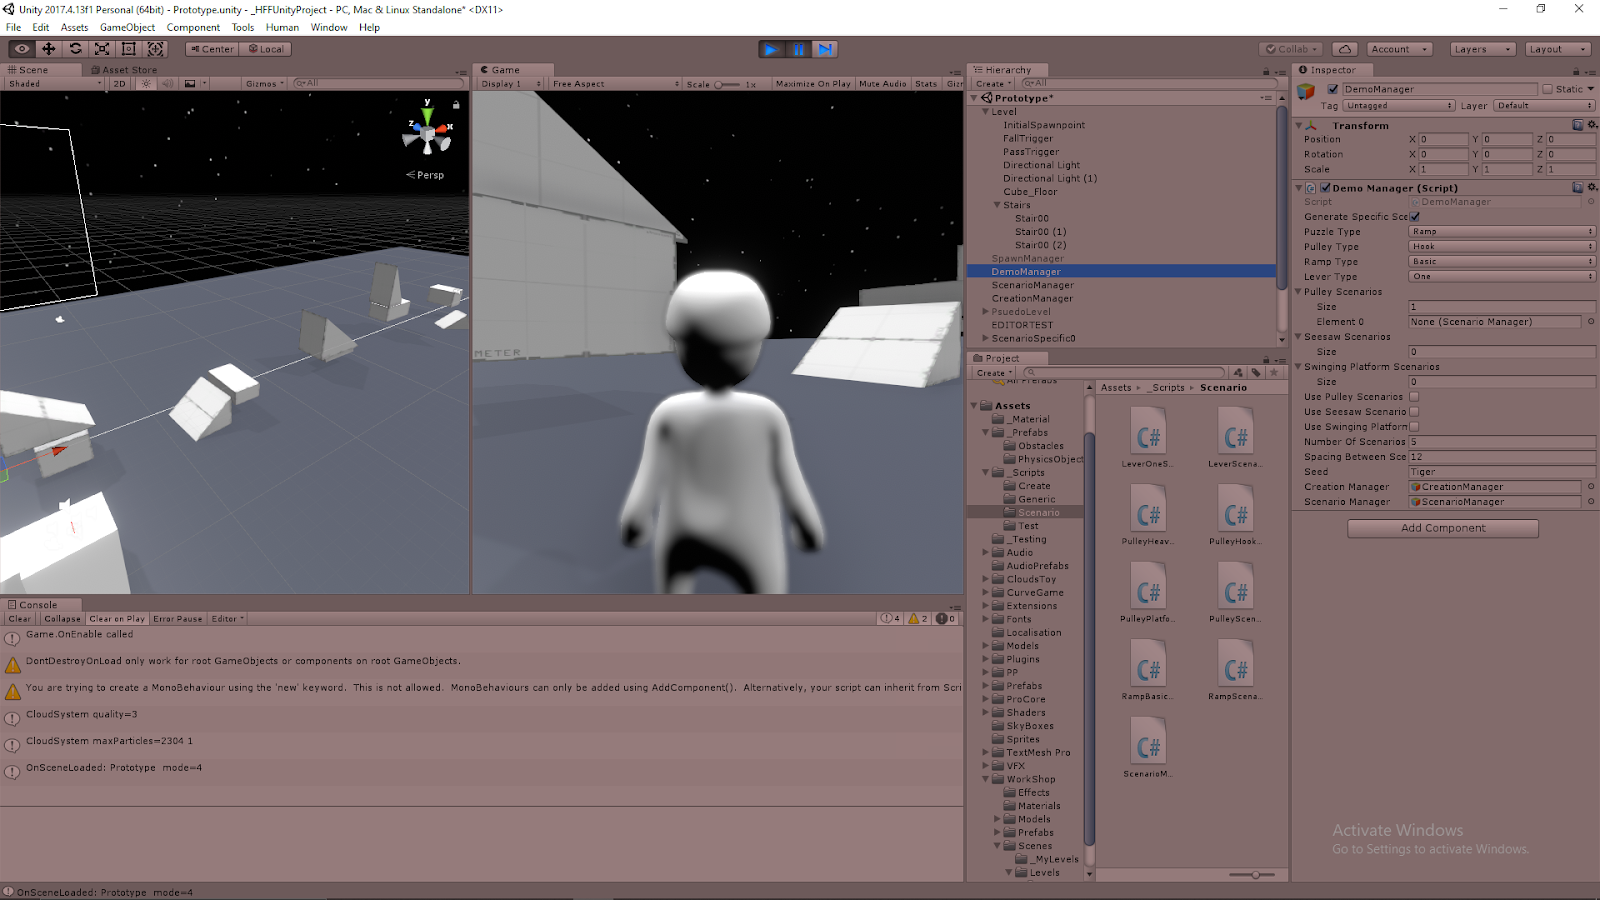
Just as a place holder, I kept a puzzle testing scenario in my Unity project scene just to test physics objects and keep references for ramp angles that work and platform sizes for different scenarios.

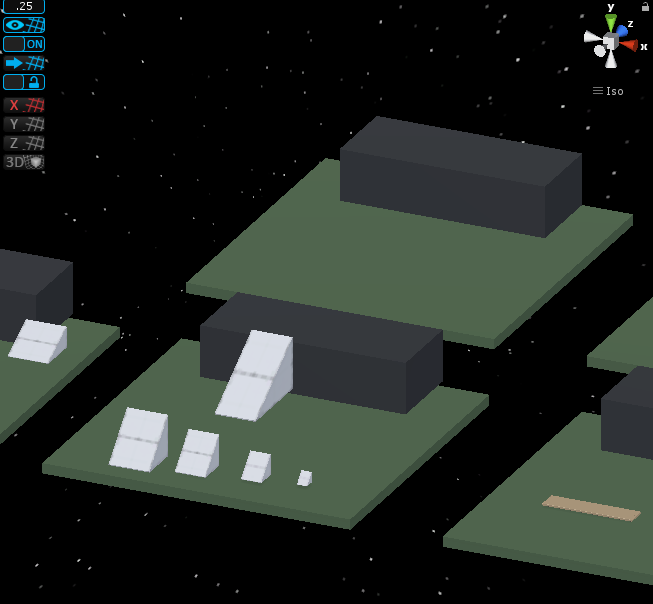
Puzzle 2: Lift Heavy Object

This scenario uses a premade seesaw in the scene to allow the player to access new locations. This is the base lever interaction as it gives a really simple environment for the player to focus on playing with a large lever object with their player character and get a base feel for how it operates when masses and forces are applied at different points along the lever. They then eventually use this knowledge to lift a heavy object somewhere with the seesaw they could not reach just by lifting it with the player.

Basic Seesaw Puzzle Scenario


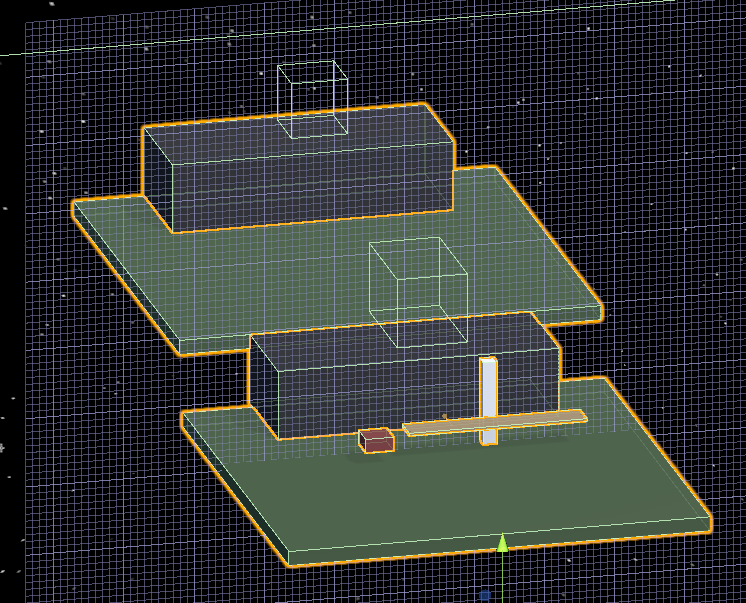
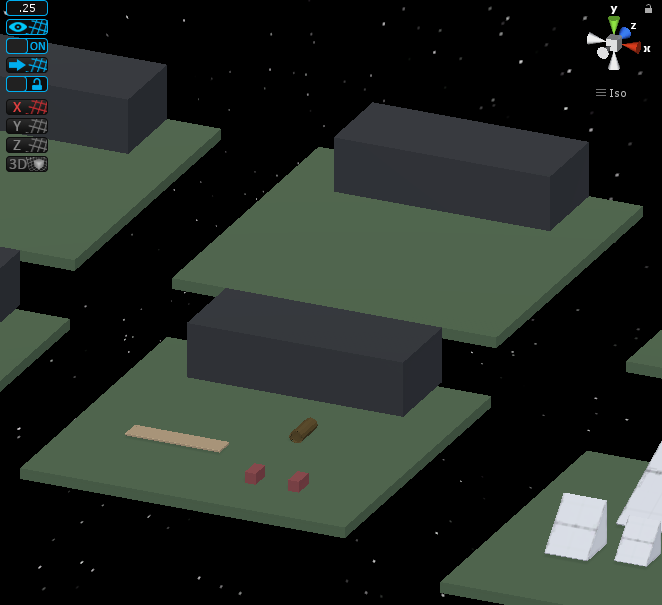
Puzzle 3: Build a Lever System

The resulting puzzle is similar to Puzzle 2, but the player is just given the parts of a lever system to work out how to put them together to create an effective lever. They are given a long platform object to operate as the main body of the lever, as well as several larger massive objects to maneuver in a way to create a fulcrum, support the fulcrum, and even use a weight to hold parts of the system in place while they operate on it.

Building a lever system in HFF can be a bit finicky, so I will need to experiment with what types of masses and objects work best to provide a workable system for the player. This is a very interesting concept overall as it provides a much more insightful application of knowledge for placement of the fulcrum and how it effects the overall system.

Build a Lever Puzzle Scenario


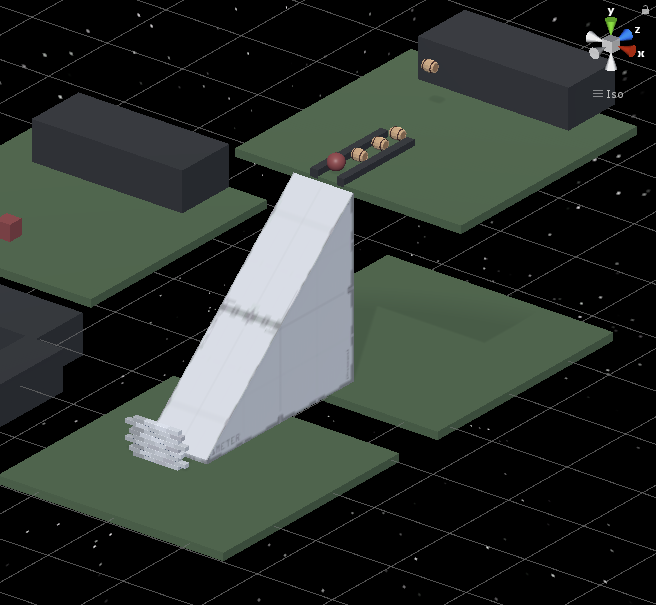
Puzzle 4: Launch Projectile

This puzzle uses a very large difference in mass between two main objects to show transfer of energy in a dramatic fashion. A very small and light object is placed on one end of a lever system, then an extremely massive object is pushed from a great height onto the other end to launch the small object as a projectile to a new location.
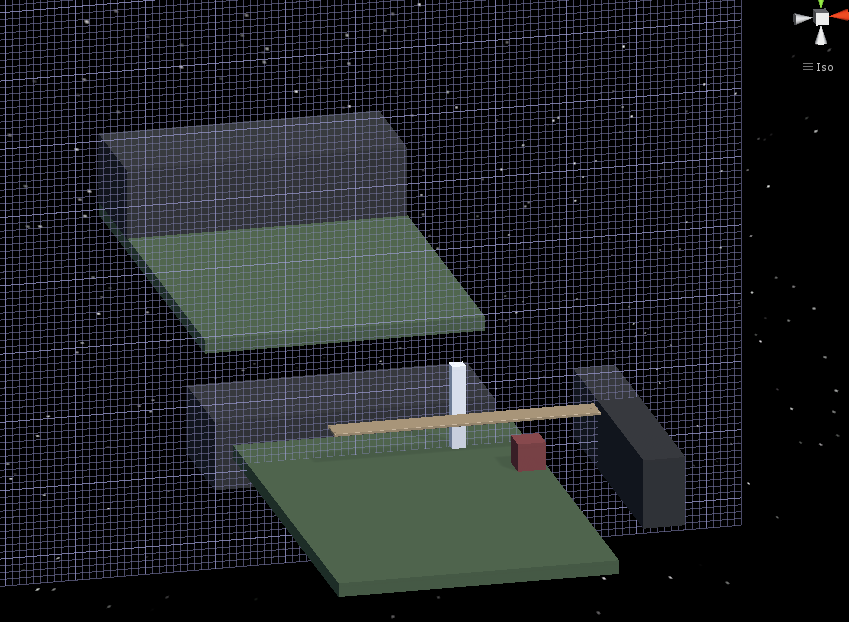
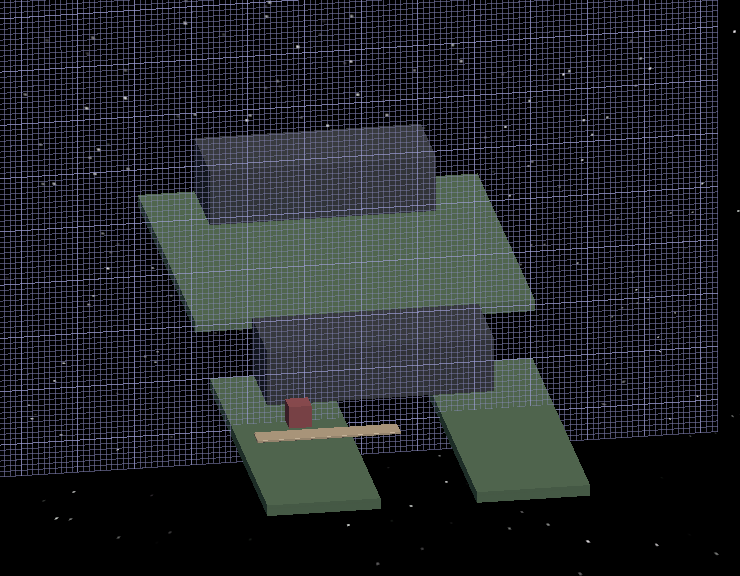
Launch a Projectile Lever Puzzle Scenario


Puzzle 5: Jam Lever

These scenarios focus on giving the player an object which they can use to restrict the movement of the lever. Many uses of the scenario focus on adding masses on top of the lever, but this scenario focuses on the player placing masses in the direction of motion of a lever in order to stop it from moving and position it in places it could not otherwise allow them to reach. This can help the player use a lever to cross very long gaps with only minimal mass in objects, since the objects are not used as torque providers.

Jam Lever Puzzle Scenario


Puzzle 6: Cantilever

These scenarios also allow the player to cross significant gaps, by having the player restrict a lever or apply a counter torque to one end of a lever so that it does not move as they move across it (or move another mass across it) as it hangs over a gap. This can be done by hanging a very long platform object over a gap and either setting a very large mass on one end, or jamming the end of the lever under something very static (similar to the inverse of the jam lever scenario above).

Cantilever Lever Puzzle Scenario


Summary

The lever puzzles have already shown to be significantly more complex to setup than the ramp puzzles. The large focus on torque with lever scenarios makes them a lot more complex, as the dimensions of objects as well as their masses need to be coordinated properly to generate solvable scenarios. Messing either of these up will quickly lead to issues where the levers are uncontrollable.

HFFWS Thesis: Hand Built Ramp Puzzles to Learn From

April 2, 2020

Hand Building Puzzles

Thesis Project

Intro

I have started crafting some small puzzle scenarios by hand to get a better idea of what types of concepts and parameters to take into consideration when creating a system to generate these types of scenarios. Researching them has only done so much, so I am helping to understand the relationships between objects within a scenario better by actively thinking through how to put them together.

Tracking Manual Puzzle Building

As I create each puzzle scenario, I have a list of data to keep track of that will hopefully help me better understand how to systematically put these scenarios together. These core ideas are: description, objects, position relations, parameter relations, skills, and concepts.

  • Description: General idea of what the puzzle scenario is and the main objective throughout
  • Objects: a list of all the objects used to make the puzzle scenario
  • Position Relations: information on how the different objects in the scenario must be placed relative to each other in order for the scenario to funciton properly (i.e. something must be placed higher than something else)
  • Parameter Relations: Similar to position relations, but with the parameters of each object; what data within each object must be within certain value ranges in order for the scenario to work (i.e. mass restrictions on certain objects)
  • Skills: what basic Human: Fall Flat gameplay skills are necessary from the player’s perspective to complete the scenario
  • Concepts: what knowledge the player must possess to understand how to complete this puzzle scenario

Current Hand Made Ramp Puzzles

I started with making ramp puzzles since they should be the simplest and help setup the general approach to this entire process. So far I have created 5 puzzle scenarios (the first of which is more of a ramp testing area). The main ideas behind them in order are: testing ramps, basic ramp, build a ramp, cross a gap with a ramp, and destroy a wall with a ramp.

Puzzle 1: Testing

This is not particularly a puzzle scenario. It is mostly just an area to test different sizes and scales of basic ramp objects to get an idea of what is manageable, scalable, and usable. This helps determine some of the dimensional restraints for the ramp objects in all cases to make sure the ramps generated are usable at all.

Testing Puzzle Area


Puzzle 2: Basic Ramp

This is more of the scenario extension of the testing area. It simply shows the most basic scenario where a ramp is provided, it just needs moved in place to allow the player to move to a higher elevation.

Basic Ramp Puzzle Scenario


Puzzle 3: Build a Ramp

This scenario provides the player with several physics objects which can be used together in such a way that they can build their own ramp to reach a higher elevation. At its core, this just requires some relatively long objects, a sturdy object to use as a central fulcrum to elevate the long object, and usually a weighted object to counter balance the torque generated by the player as they move up the long ramp object.

Build a Ramp Puzzle Scenario


Puzzle 4: Cross Gap with Ramp

This scenario type utilizes the fact that a ramp can also fulfill some properties of a bridge to span gaps, while still using the fact that the ramp helps move objects across elevations as well. Positioning ramps with this idea in mind is tricky since a lot of cases can lead to the ramp sinking into the gap if the player cannot get it cleanly across immediately.

Cross Gap with Ramp Puzzle Scenario


Puzzle 5: Destroy Wall with Ramp

Ramps help facilitate the movement of rolling objects in a way the player cannot accomplish by simply pushing them along the ground. Gravity helps move a rolling object down a ramp, accelerating it to allow it to reach speeds the player could not generally achieve on their own. This significant speed allows the rolling objects to apply a lot of force near the bottom of the ramp, which can greatly exceed that of the player in the right circumstances. This force can be used to destroy some of the destructible walls or environments in Human: Fall Flat to allow for progression.

Destructible Wall Ramp Puzzle Scenario


Summary

I will continue exploring these various puzzle scenarios since they both give me a better understanding of the relationships for proper puzzle generation as well as help give me ideas to expand the eventual puzzle generators capabilities. The basic testing area has helped give me some base parameters to work with, such as usable ramp slopes and general movable object masses, and the more advanced scenarios are helping uncover the multitude of relationships I need to keep together when building out these systems.

HFFWS Thesis: Clearly Determining Space for Scenarios and Creating Barriers Between Them

March 11, 2020

Spacing Scenarios and Dividing with Obstacles

Thesis Project

Space Buffering

In the process of creating a simplified version of this generation system, I narrowed down the variability for now with a core focus on better defining the space a scenario has to work with. To keep it easier to work with, it is focused on a single axis for the most part, the x-axis, in spacing. This ties in to making the general space easier to define as well.

The overall spacing is mostly determined by spacing on the x-axis. The entire sequence of scenarios is constrained to a single overall platform with a fixed width, so every scenario is working with that same fixed width as well. The height does not particularly need to be constrained at this time, so determining a general x and z dimension for the space with an arbitrarily given y dimension works to define our space well for now.

Finally, to help visualize this space in the editor, I looked to DrawGizmos methods within Unity. I am currently creating a yellow wireframe cube centered at each of these central scenario locations with dimensions based on the scenario spacing (x-axis), the scenario width (z-axis), and an arbitrarily large height (y-dimension), each of which is determined within the DemoManager.

Creating Obstacles to Sequence the Scenarios

We wanted to start looking into having the chain of scenarios play into each other, so the first concept to look into for that was creating significant obstacles at the “end” of each scenario that needed to be overcome to reach the next one. The idea for the simplest approach for this was to create a significantly tall wall that covered the entire width of the play area and was placed at the end of the scenario space (the end on the x-axis). Again, to simplify the approach, this was investigated solely with ramp scenarios for now.

Creating this wall originates with using the existing CreateObstacleTerrain class I created, which basically makes various rectangular-shaped obstacles. The scenarioWidth information is passed into this creation to ensure that the wall covers the full width of the play area. The scenario spacing information passed from the DemoManager helps with the placement of this wall at the end of the scenario.

The order of operations follows that the ramp is generated, and then the obstacle. With this, the ramp height is recorded and passed on to the wall to determine its height range. This ensures the wall is tall enough to provide a challenge, but not so tall that it can not be overcome.

Finally, to help position this obstacle even more accurately, it is actually repositioned after its parameters are determined. The systems chooses the wall obstacle’s dimensions from its available options, and then feeds this data into a method to finally place the wall. This helps adjust the position of the wall for its thickness especially when making sure it fits in the end of the scenario area without going into the next area.

HFFWS Thesis: Starting Ramp Puzzle Generation

March 5, 2020

Ramp Puzzle Scenario Generation

Thesis Project

Notes

I have added the basic foundation for creating ramp scenarios in my HFFWS generation system for my thesis project. This starts with simply making very standard full ramp objects with a corresponding obstacle object.

The ramp objects are the most straight forward ramp shape, being a flat angular shape. They are scaled randomly given a range of parameters for all three dimensions. These are generated first, and then the obstacle is generated with data passed from the creation of the ramp. Right now it just accepts the height data from the generated ramp and uses it as the new maxHeight option for the obstacle. The idea is that this will keep the obstacle from ever being out of reach of the ramp (but this will actually require the tweaking of a few other parameters as well, such as positioning).

Sample Image of 5 Generated Ramp Scenarios

Human: Fall Flat Level Concept/Skill Breakdown – Medieval

February 27, 2020

HFF Level Concept/Skill Breakdown

Level: Medieval

Playthrough Sources Referenced

Human Fall Flat (No Commentary) (16/09/2017)

Video #1

By: SpeedyAvatar


Human Fall Flat – Full Playthrough w/ summit1g

Video #2

By: summit1g


Title: Automatic Game Progression Design through Analysis of Solution Features
Source:

E. Butler, E. Andersen, A. M. Smith, S. Gulwani, and Z. Popović, “Automatic Game Progression Design through Analysis of Solution Features,” 2015, pp. 2407–2416, doi: 10.1145/2702123.2702330.

Overview

I am looking into existing HFF levels to analyze the various small puzzle scenarios present in an attempt to breakdown what skills and/or concepts the player needs to understand or be able to act upon in order to complete them. The approach on how these are broken down was inspired by the the way procedural traces and n-grams are used in the above source by Butler et al. It is hoped that this approach to breaking down various puzzle scenarios in HFF will help with the automatic generation of such scenarios. I have also included an object list for each scenario to keep track of how many objects are needed for simple puzzle scenarios.

This breakdown goes throw the Medieval level of the base Human: Fall Flat game. I split up the individual puzzle scenarios the player encounters throughout the level in the steps required for a single solution avenue for completing the puzzle. Each of these steps is them given some simple skill or concepts necessary to understand to perform each step.

Medieval Level Breakdown

Scenario 1

    Intro: Lock Smashing

  1. Picks up rock (Grab)
  2. Breaks lock with rock (Breakable Object)(Apply Force)
  3. Opens door (Grab)(Pull)(Open door)
Object list:

Rock, Door, Lock


Scenario 2

    Cross Gap to Door

  1. Grabs long bar (Grab)
  2. Places bar over gap to act as bridge (Create platform)
  3. Walks across bar to door
Object list:

Long Bar, Stairs, Platform, Door


Scenario 3

    Catapult to Break Walls

  1. Move catapult into position (Push)(Pull)
  2. Wind catapult to loading position (Push)(Pull)(Grab)(Interact)
  3. Lift rock onto catapult (Pickup object)
  4. Press catapult lever to shoot rock (Push)(Interact)
  5. Rock hits wall to break it open: Gravity for aiming (Apply force)(Force = mass * acceleration)(Gravity)(Breakable Object)
Object list:

Catapult, Rock(s), Wall


Scenario 4

    Inside Castle: Rickshaw Platform

  1. Grab rickshaw handles (Grab)
  2. Lift rickshaw up by handles : Helps wheels to roll (Lift object)(Friction)
  3. Move rickshaw with rock on it into place as platform (Create platform)
  4. Lift self onto rock (Lift self)
  5. Jump onto higher area (Jump)
Object list:

Rickshaw, Large Rock (on rickshaw), Platform


Scenario 5

    Swinging Between Lanterns

  1. Lift bar on door to open it (Lift object)
  2. Bring in rickshaw from previous section (Resource management)(Memory)
  3. Move rickshaw with rock on it into place as platform (Create platform)
  4. Lift self onto rock (Lift self)
  5. Jump onto higher area (Jump)
  6. Jump onto lantern to swing (Jump)(Grab)(Hold)
  7. Swing on lantern (Momentum)
  8. Jump from lantern to platform : Falling to lower platform (Momentum)(Gravity)
Object list:

Rickshaw, Large Rock (on rickshaw), Platform (Many), Lantern(s) (Many)


Scenario 6

    Move Very Heavy Rickshaw

  1. Move (heavier) rickshaw with rock on it into place as platform (Create platform)
  2. Jump and lift self onto nearby platform several times (Jump)(Lift self)
  3. Go across platform created by rickshaw moved in place
Object list:

Large Rickshaw, Rock (Very heavy), Small Platforms (Many), Bridge (with gap)


Scenario 7

    Swing Across Gap with Hook

  1. Grab large hook (Pickup object)(Grab)
  2. Hook hook onto protruding bar to swing self across gap (Momentum)(Gravity)(Hold)
Object list:

Large Hook, Protruding Bar, Platform


Scenario 8

    Rotate Pulley-Like Wheel to Lift Board as Ramp

  1. Pickup Large Hook (Pickup object)
  2. Use hook to pull down above large wooden board (Gravity)(Reach)(Pull)
  3. Pull large wooden board so half is on roped stone (Pull)
  4. Rotate nearby wheel connected to rope to lift stone, raising the large wooden board to create a ramp platform (Pulley)(Create platform)
Object list:

Large Hook, Large Wooden Board, Platform, Wheel Pulley Setup (Large Wheel connected to Rope which is connected to Large Stone), Terrain Bump


Scenario 9

    Push Barrel Down Ramp and Climb Many Platforms

  1. Open Door (Pull)
  2. Go up stairs
  3. Open Door (Pull)
  4. Roll barrel down ramp to get to other side (Pull)(Push)(Gravity)(Ramp)(Roll)
  5. Move barrel in position to reach next platform (Create Platform)(Pull)(Push)
  6. Jump onto barrel and next higher platforms (Jump)(Lift self)
  7. Jump up onto several higher platforms (Jump)(Lift self)
  8. Turn wheel to open gate (Interact)(Grab)(Open door)
Object list:

Barrel, Ramp, High Platform, Platforms (Many), Gate (with attached wheel opening device)


Scenario 10

    Free Lantern to Swing From

  1. Grab Large Hook (Pickup object)
  2. Use hook to free stuck lantern with chain (Reach)(Interact)
  3. Swing on lantern to next platform (Jump)(Hold)(Momentum)(Gravity)
  4. Grab platform and lift self up (Lift self)(Hold)(Grab)
Object list:

Large Hook, Lantern (w/chain), Platforms (Two)


Scenario 11

    Launch Self with Windmill

  1. Grab onto windmill (Grab)(Hold)
  2. Let go of windmill to launch self to next area (Momentum)(Gravity)
Object list:

Windmill, Platform


Scenario 12

    Build Ramp with Board, Anvil, and Cylinder

  1. Remove heavy anvil from board to free board (Push)(Pull)(Reduce Mass)
  2. Move anvil, board, and cylinder in front of open area of higher platform
  3. (Push)(Pull)
  4. Place board over cylinder so cylinder acts as fulcrum of ramp
  5. (Ramp)(Push)(Pull)(Create platform)
  6. Place anvil at far end of board to keep it pinned to the ground (Increase mass)(Ramp)(Cantilever)
  7. Walk up created ramp and jump and lift self to next area (Jump)(Lift self)
Object list:

Board, Anvil, Cylinder, High Platform


Scenario 13

    Build Ramp to Get Tethered Bucket into Hole

  1. Remove board from covering hole in ground (Pull)
  2. Move board to tree to use as ramp (Ramp)(Pull)
  3. Go up ramp to reach higher platforms (Jump)(Lift self)
  4. Free tethered bucket from high platform (Push)
Object list:

Bucket (connected to rope connected to tree), Tree, Boards (x2 on hole), Platforms (x2)


Scenario 14

    Loose Rock Pillar Cave Platforming

  1. Jump onto loose rock pillar to fall onto next platform (Momentum)(Jump)(Breakable Object)
  2. Walk across next rock platform
  3. Jump to rock platform which breaks and falls to next platform (Jump)(Hold)(Breakable Object)(Momentum)
  4. Lift self onto next rock platform (Lift self)
  5. Jump to next loose rock pillar to fall into next area (Momentum)(Jump)(Breakable Object)
Object list:

Loose Rock Pillars (Many), Platforms (Many)


Scenario 15

    Launch Self to Castle Gate with Catapult

  1. Move catapult into position (Push)(Pull)
  2. Wind catapult to loading position (Push)(Pull)(Grab)(Interact)
  3. Load self into catapult
  4. Press catapult lever to shoot self (Push)(Interact)
  5. Hold onto draw bridge, which pulls it down (Hold)(Lever)(Torque)
  6. Lift long loose piece of bridge out (Pull)(Pickup object)
  7. Place long piece into opening in gate to create ramp (Ramp)
Object list:

Catapult, Draw Bridge


Using LM-GM Analysis on Human: Fall Flat for Thesis (Condensed Lists)

February 5, 2020

HFF LM-GM Analysis

Thesis Project

Title: Mapping learning and game mechanics for serious games analysis
Source:

S. Arnab et al., “Mapping learning and game mechanics for serious games analysis: Mapping learning and game mechanics,” British Journal of Educational Technology, vol. 46, no. 2, pp. 391–411, Mar. 2015, doi: 10.1111/bjet.12113.

List of Game Mechanics

The following is the list of game mechanics I observed in Human: Fall Flat according to the source above (with noting for those that are major factors, and those that are only really present in multiplayer):

  • Behavioral Momentum
  • Cooperation (*multiplayer only)
  • Collaboration (*multiplayer only)
  • Cascading Information (*multiplayer only)
  • Resource Management (Major factor)
  • Strategy/Planning (Major factor)
  • Infinite Gameplay (offered by game somewhat, but major focus of developed system)
  • Levels (Major factor)
  • Pavlovian Interactions
  • Feedback (major factor)
  • Movement
  • Design/Editing
  • Simulate/Response (Major factor)
  • Realism
  • Tutorial
  • Urgent Optimism

List of Learning Mechanics

The following is the list of learning mechanics I observed in Human: Fall Flat according to the source above (with noting for those that are major factors, and those that are only really present in multiplayer):

  • Instructional
  • Guidance
  • Action/Task (Major factor)
  • Observation (Major factor)
  • Feedback (Major factor)
  • Identify (Major factor)
  • Explore
  • Discover
  • Plan (Major factor)
  • Objectify (Major factor)
  • Experimentation (Major factor)
  • Hypothesis (Major factor)
  • Repetition (Major factor; system focus)
  • Analyze
  • Simulation (Major factor)
  • Ownership
  • Motivation (Major factor)
  • Incentive

Summary

These are just the condensed lists of mechanics I observed within HFF by applying those found in the source above. I will put up a post with my more in-depth analysis of how I believe each of these apply in HFF to support why I chose them.

I created this list to better understand what HFF provides as a possible learning tool. This also helped link the game mechanics with the learning mechanics to get a better idea of which parts of the game to focus on generating with our system to enhance the learning opportunities.

Thesis: Starting Table of Sources for Related Works and Background Section

January 27, 2020

Thesis Paper

Related Works and Background Table

SUMMARY

The newly named Related Works and Background section for my thesis paper contains a lot of references to my many sources and how they connect with my research and project. We are now looking to add a table to this section to help organize all of these sources and show the reader more clearly what each source did and how it was incorporated into my thesis. As of now there are slightly over 30 sources referenced in this section, so I have only started to create this table.

Since the table is still in the early drafts, it uses a bit of short hand. There are eight columns: Source, Title, Method, Game, Study, Results, Provide, Other Notes. This is the breakdown of what those sections each entail (the parenthetical is the general question that section looks to answer, and the following text is more description for clarification):

  • Source – (What is it?) This is my latex name for the source
  • Title – (What is it?) Title of the research paper, article, etc.
  • Method – (What is the interesting aspect?) Ex. PCG Technique, Theoretical Framework, etc.
  • Game – (What game did they use/develop, if any?)
  • Study – (How did they do their research?) What tests did they perform/how did they reach their conclusions?
  • Results – (What did they acheive?) Their findings and conclusions from their research
  • Provide – (What did it provide to our project/research?) How did this source influence our research or how the project was designed
  • Other Notes – Extra notes that won’t be in the final table but are useful to keep in mind when putting it together or may be used in the table instead of something else

The image quality is not very good but that was as good as I could get it for Blogger at this time.

Image of Table in Current State

By: Me – Table for Thesis Related Works and Background Section Describing Sources Referenced

Thesis – HFFWS Project Update – Finishing/Fixing Foundation of Pulley Scenarios

January 17, 2020

HFFWS Generation System

Fixing Pulley Scenario Foundation

Pulley Scenario Issues

Not Producing Designated Number of Scenarios

This was working before, so it was weird that the issue came up for all three pulley options after updating, including the original scenario I worked on, HeavyDoor. I found that the wheel positioning method was getting an array index error, so I focused around there.

Instances where just one wheel needed to be created seemed to actually work fine, so there was something about creating multiple wheels that was causing an issue. I looked into what was happening after the first wheel was created, and there is a method dealing with the list of weighted ranges that can remove a range without adding any new ones after choosing a position (this option exists for when a chosen position is within the buffer range on both sides of it to other taken positions, or ends).

It would make sense that we get an indexing error if we started with one range (which it always does), but then because of the chosen parameters, removed that single range from the list. This appeared to exactly be the case. The generated ropes weren’t long enough, so choosing a single position with the given buffer ranges was effectively taking up the whole rope, so there were no valid positions left, giving an error and ending the cycle of generating scenarios.

As a quick fix just to continue testing, I simply changed the parameters to only give longer ropes and this removed the error completely. To at least help notify the user of this problem in the future, I added a Debug.LogError if the range list is empty but the system tries to find a new position. This will be something I will need to come back to later to increase the intelligence of the system to so that it itself modifies either the length of the rope to fit the chosen number of wheels, or reduces the number of wheel options depending on the rope size (most likely the latter choice).

HFFWS Generate Scenario As Gameobject Hierarchy

December 15, 2019

HFFWS Generation System

Scenario Gameobject Hierarchy

Connecting the System for Scenario Gameobject Hierarchy Organization

To help with organization of the overall system in Unity, I wanted each generated scenario to be fully contained within its own, single gameobject hierarchy. To do this, I had the DemoManager, my highest level in the system, create an overall gameobject that will act as the parent for the entire scenario hieararchy. This reference was then passed to the current ScenarioManager object, which can then pass it to all of its associated Create classes so they can all instantiate their chosen objects as children of that same parent gameobject.

The other benefit of this is that it helps with spacing out the individual scenarios for my DemoManager. The instantiated empty parent gameobjects have their transform.position set by the spacingBetweenScenarios variable within the DemoManager. This gives everything childed to it some significant spacing to work with with minimal programming effort.

Each ScenarioSpecific# GameObject Contains a full Pulley Setup

HFFWS Generation System Overview Update

December 5, 2019

HFFWS Generation System

Overview Update

General System Overview

I have updated my thoughts on setting up the overall system to fit the demands for my thesis as well as to keep everything more organized and readable. I am sure as I go through building this I will find ways to cut out levels of inheritance or add scripts for readability, but this is the most recent view on everything. I want the highest level to be very general (DemoManager), the middle level should be where the majority of parameter ranges and interactive placement between objects should be (ScenarioManager’s), and the lowest level will be in charge of putting together the needed objects within the bounds dictated by the higher levels (Create classes).

This image just shows the general idea of the overall hierarchy (the actual number of ScenarioManagers and Create classes is not accurate). The DemoManager holds references to all of the ScenarioManagers, but only chooses one ScenarioManager at a time to develop its scenario. Each ScenarioManager is connected to specific Create classes within a large pool of Create classes, which will be the objects that specific scenario will actually possibly need to create. The Create classes referenced to can overlap as some objects will be used in multiple scenarios.

DemoManager (change to GenerationManager)

The name of GenerationManager was changed to DemoManager to fit its purpose better. Since the system will be mainly used for demonstration purposes, it will focus its functionality on generating any varied number of scenarios and allowing for real time resetting.

Goal:

Passes down highest level information to ScenarioManager level. This will include puzzle type, variation types within that puzzle type, and any other high level information such as overall positioning or how many scenarios in total to generate.

Needs:
  • Number of scenarios to generate
  • List to hold information on all scenario options
    • Customizable in editor to pin point certain scenarios if wanted
    • ScenarioManager level objects should be same type of object to help with this listing
  • Scenario spacing
  • Input to reset generation in real time
  • Seed information (may be better in scenario manager level)
Notes:
  • Will have some bool list of scenario types to include in its random generation
  • For testing, have “GenerateSpecific” bool to allow for creating a single specific scenario
  • ScenarioManager

    I think it makes sense to commit to setting up an internal hierarchy setup within the ScenarioManager level at this point. This allows the DemoManager to just deal with ScenarioManager type objects, but I can break each scenario type down into its own class to help keep the scripts manageable and more organized.

    Goal:

    Will take DemoManager information and use it to determine which “Create” type classes will need to be used (or have the option of being used), how many times to use each, and what other information needs to be passed on to them (the “Create” type classes) to properly build out the desired scenario.

    Needs:
    • Hold Parameter Ranges
      • will need to be moved over from current Create classes
    • References to Create type classes
    Example for Possible Inheritance Pattern
    • ScenarioManager
      • PulleyScenarioManager
        • HeaveyDoorPulley
        • PlatformPulley
        • HookPulley
    • Information for all general scenarios
      • Information for a general type of scenario
        • Specific information for a specific type of puzzle in a specific type of scenario

    This shows the inheritance setup within the ScenarioManager level from the overall system setup.

    Create Classes

    I have not worked with these enough yet to fully update them, but I am looking at creating a base Create class that holds general data that any of those classes will need. Then each type of object will have its own Create type class that derives from this class detailing all of the specifics for altering the parameters of that overall object.