January 20, 2021
Tilemap 2D
Unity
Beginner Programming: Unity Game Dev Courses
Unity Learn Course – Introduction to Tilemaps – 2019.3
Description:
Basics of using Tilemaps for 2D projects in Unity.
Tilemap Basics
Grid
- Only one in scene
- Creates layout for scene that Tilemaps rely on
- Cell Size: size of each square on Grid; applies to all Tilemaps within Grid
- Cell Gap: space between each square on Grid; applies to all Tilemaps within Grid
- Cell Layout: layout of tiles on grid; Options such as rectangle, hexagonal, isometric, isometric z as y
- Cell Swizzle: direction Grid is facing; options such as XYZ, XZY, etc.
Tilemap
There can be multiple in a scene and it has two components: Tilemap and Tilemap Renderer.
Tilemap Component
Controls how the Tilemap behaves and how tiles within it work.
- Controls how Tilemap behaves and how tiles within work
- Animation Frame Rate: affects spped of animated tiles in Tilemap
- Color: color and transparency
- Tile Anchor: where tile is anchored to grid
- Orientation: direction tiles are facing
Tilemap Renderer Component
Change how tiles are rendered and sorting order.
Modes
Chunk Mode
- Sprites on Tilemap rendered in batches with each batch being treated as a single sort item in the 2D transparent queue
- reduced draw calls for performance
- other renderers cannot be layered or rendered in between part of the Tilemap
- ideal for terrain base layer or other “single depth” maps
Individual Mode
- sprites sorted based on position in Tilemap and Sort Order
- render to allow interweaving of sprites
- good for allowing sprites to pass behind other sprites
Other Parameters
- Detect Chunk Culling: detect chunk bounds automatically or set them manually
- Chunk Culling Bounds: extension of bounds for culling in Chunk Mode
- Mask Interaction: can make Tilemap visible only inside or outside a Sprite Mask
- Material: change material used to render each tile
- Sorting Layer: Layer defining Sprites’ overlay priority during rendering
- Order in Layer: helps determine which Layer is rendered first
Tilemap Collider 2D
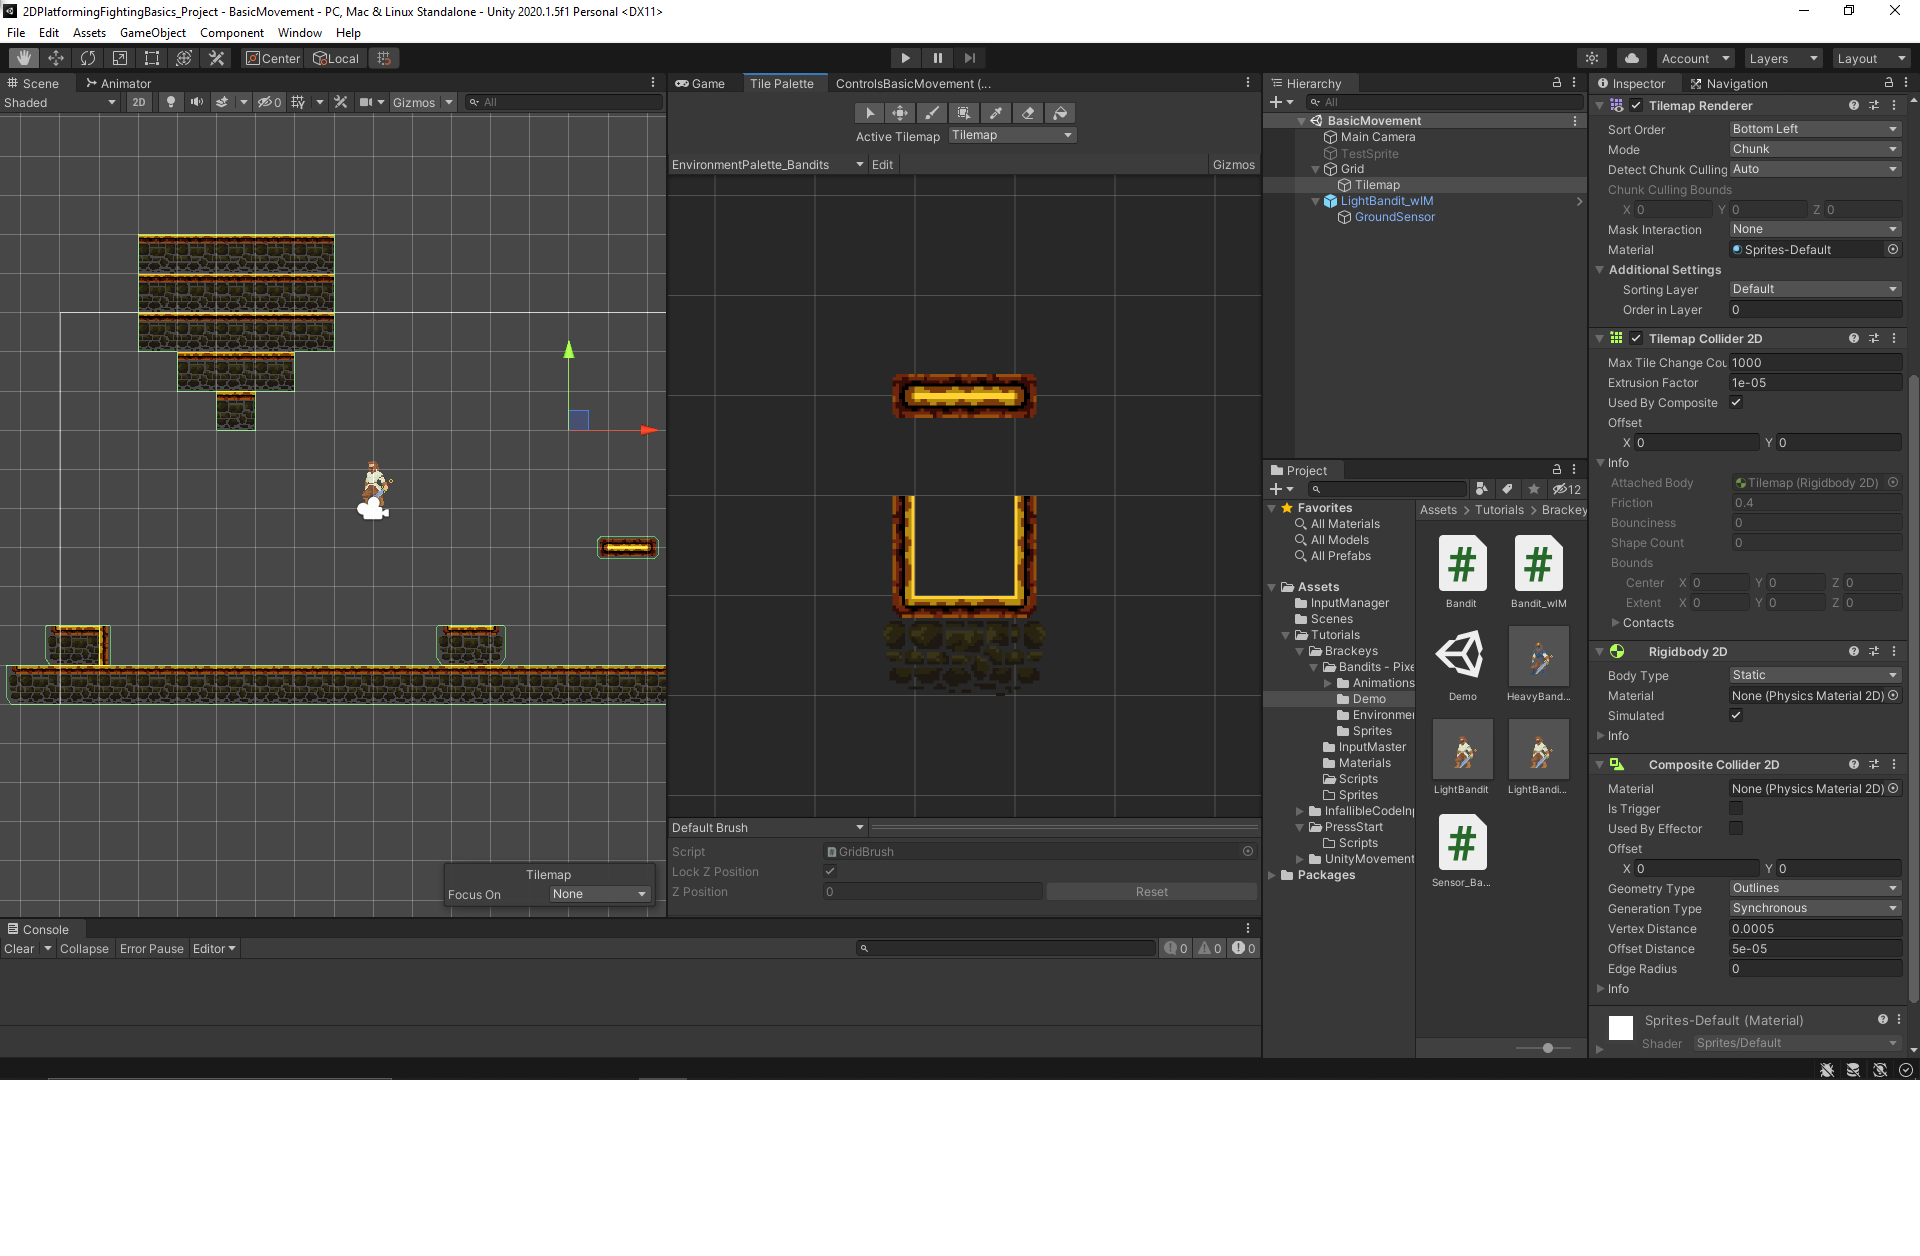
This is an additional component of the Tilemap object (with Tilemap Renderer). This makes the entire Tilemap have colliders. Having many individual tile colliders can cause objects or players to get caught on the seams, so the tile colliders can be combined using composites. This can be done on the Tilemap Collider 2D, just toggle on “Used By Composite” and add the components: Composite Collider 2D, and Rigidbody 2D.
The following image shows my use of these tile map basics using Unity assets from a separate Brackeys tutorial. I experimented with adding flipped and rotated versions of some of the existing sprites to the tilemap and using the automatic colliders of the tiles. I had issues with the separate tile colliders because they would catch the player moving along the floor, so this image shows the composite collider solution to fix the colliders. This solved that issue and cleaned up the colliders.
Keyboard Shortcuts: Rotate and Flip
Flip Sprite: { “Shift + [“
Rotate Sprite: [
Summary
Tilemaps are actually extremely easy to use and seem to give pretty effective results. I did have the issue with the individual colliders immediately after using the automatic colliders, but it appeared to be resolved with the composite colliders, which combine the colliders into large contiguous colliders. The difference between selecting, moving, and brushing tiles can be weird sometimes, but I was able to get the hang of it eventually and the process became fairly smooth after a while. Finding the keyboard shortcuts for rotating and flipping was also a bit strange, but was very useful once I found it.
via Blogger http://stevelilleyschool.blogspot.com/2021/01/unity-tilemap-2d-basics-and-unity-learn.html