March 12, 2020
Updating A*
Adding 3D Movement (Elevations)
A* Current System and Notes
Now the A* system can deal with moving units along the y-axis according to the terrain, but it is still off with the advanced path smoothing functionality since this only cares about points where the unit is turning according to the xz-plane. To keep the system more simplified for now, I am looking to roll back some of the more advanced functionality from the Sebastian Lague tutorial I followed to incorporate the y-axis movement into a more simplified pathing system.
I want to ignore the SimplifyPath method for now (which narrows down the full list of nodes for a path down to only those which turn the agent, and only uses these as waypoints), which also causes problems if I have path smoothing as well. This is another reason to remove path smoothing temporarily.
A* Update
I wanted to keep the advanced path smoothing options available in the project, while looking to use the simplified version for now (with updates to continue having the y-axis movement). To do this, I identified which scripts dealt with path smoothing specifically which led me to the chain of these scripts:
- PathFindingHeap
- Unit
- PathRequestManager
Since those were the scripts that dealt with applying path smoothing, I looked for versions of the project I saved as stepping stones of the tutorial that were before path smoothing (around episode 8 of the tutorials). From these projects, I grabbed their respective versions of these scripts to copy into this working project. To keep them as unique but separate options, I appended “Simple” to these versions of the scripts.
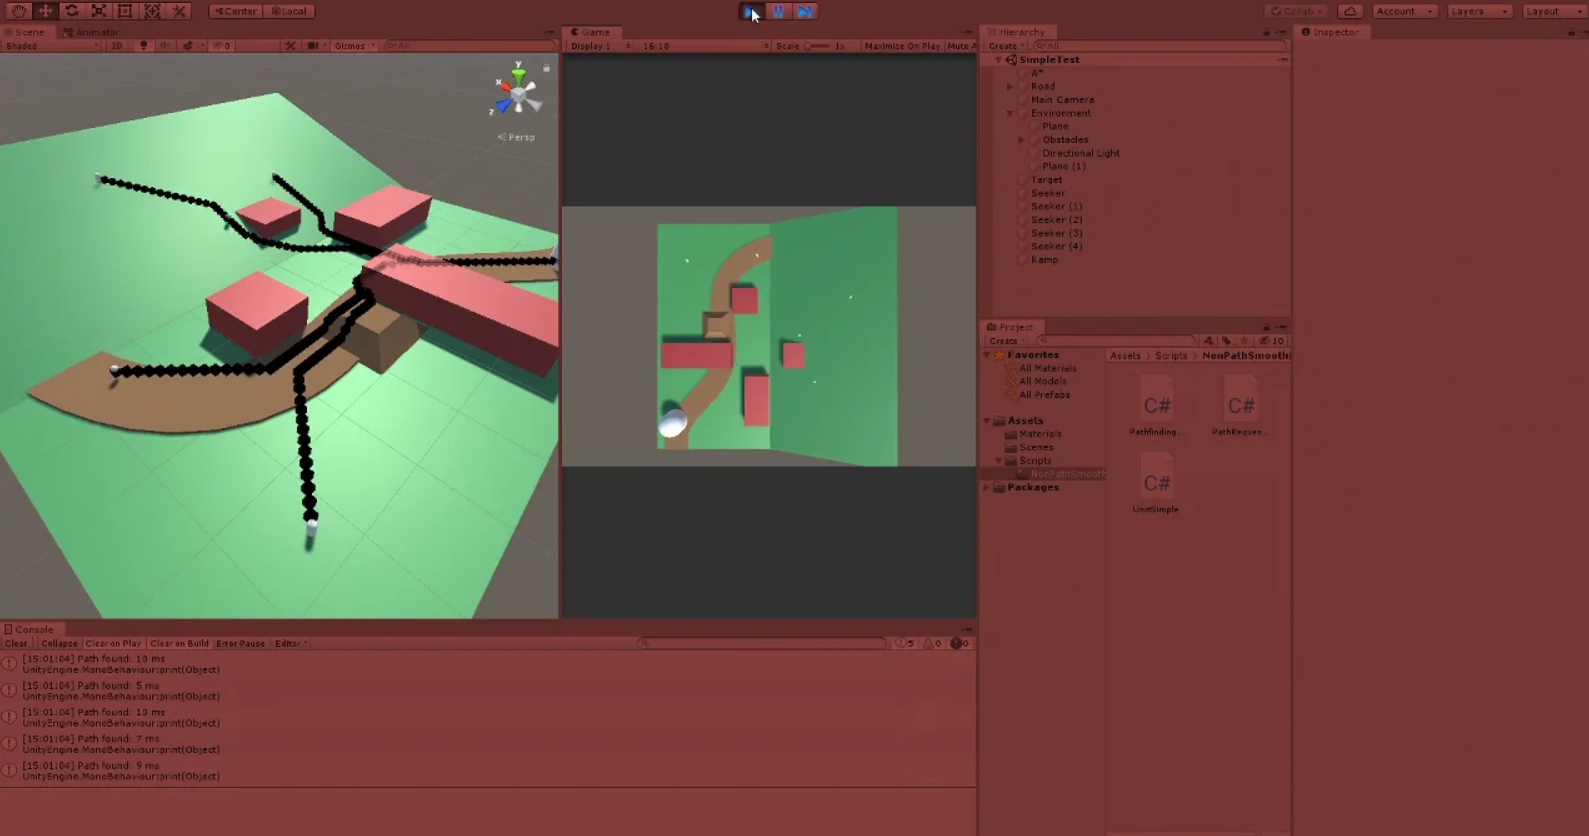
With these scripts, I could build out a scene (named SimpleTest) for the purposes of testing the y-axis movement with this simpler movement logic. While it is less aesthetically pleasing, it is in a way more accurate and representative of the core information the system is working with, so I wanted to get back to this state to have a better idea of what I was working with. This new scene has PathFindingHeapSimple and PathRequestManagerSimple on its A* gameobject, and each of the Seekers use the UnitSimple script instead.
With all of these in place to effectively remove path smoothing for now, I could effectively remove the SimplifyPath method from PathFindingHeap (and PathFindingHeapSimple as well for this case). This ensures the agents will travel to each individual position designated by every node along its path. This helps me see exactly every point of data that the agents are working with when moving. This is helpful to make sure the agents are properly receiving the right elevation data throughout the entirety of their paths.
With all of this done, I got the desired results I expected. The units immediately fly down into their starting position and move along the terrain properly, regardless of elevation. They effectively move up and down inclined surfaces, and can properly navigate up and down bumps and ramps in the terrain. They also show every single node point as a gizmo they are using as a path for movement, which clearly shows their paths following the terrain. I have included a video link for a quick demonstration of the agents in motion.
Next Steps
This simplified system appears to work exactly how I need it to, and I think this may be the preferred approach moving forward for now since it will be used to represent and show theoretical data. This may make it more practical to show the exact pathing information given as opposed to the skewed pathing created by the path smoothing operations.
The next step will be looking into creating objects which can influence the cost of a number nodes around them (as opposed to just those they are directly on, which is somewhat covered in the behavior of obstacles). This way different objects can influence the likelihood of an agent moving towards/around them.
I am looking at starting with a simple area of effect approach where the grid detects the object on a certain node and then alters the cost of all the nodes around it to some degree (the simpler approach, and mimics the blur effect already present from the tutorial followed). This blur effect makes it so the cost additions of the grass and road are blurred some around where they meet. The future advancement of this topic would be to allow objects to influence the cost of nodes based on line of sight, which is a much more variable amount of nodes to influence, making it a bit more difficult to implement.