Online Multiplayer Networking Solution Tutorial Using Unity and Mirror – Tutorial by: Jason Weimann

February 2, 2021

Networking Online Multiplayer

Unity & Mirror

Title:
Let’s build a 4-Player Networked Game LIVE – Online Shooter (with Mirror & Unity)

By:
Jason Weimann


Youtube – Tutorial

Description:
Intro to using Mirror for networking online multiplayer play in Unity development.


Introduction

This tutorial has Jason Weimann implementing online network play into a basic Unity twin-stick shooting game. They use Mirror, which is a Unity asset used for simplifying the online network synchronization process. This is a live implementation where they work through many errors transferring a game from simply working locally to working with a host/client relationship.

Mirror

Mirror – Home Page

Mirror is “a high level Networking API for Unity, supporting different low level Transports” (from Mirror themselves). It is a clean solution for implementing a quick and simple online networking option for Unity projects. The core components breakdown as such (supplied by their site):

  • [Server] / [Client]: tags can be used for the server-only and client-only parts
  • [Command]s: are used for Client -> Server communication
  • [ClientRpc] / [TargetRpc]: for Server -> Client communication
  • [SyncVar]s and SyncLists: are used to automatically synchronize state

Authoritative Server

When creating a networking environment for a project, it is important to determine what aspects of it are determined server-side and what are determined client-side. With games, most information should generally be handled server-side since this helps prevent cheating or hacking. Most games with larger scale player bases will have dedicated servers to handle the online play of the games, and these handle a majority of the data as well as checking data coming in from the clients helps in the efforts to mitigate cheating.

As they go through the tutorial, the only information they end up handling client-side is that specific player’s transform. To help keep the game feeling as clean and smooth as possible for the player, they at least allow this to be determined client-side so any of their movement is quickly shown to them. This information is then sent to the server to be distributed. While this opens an avenue for cheating, the data being sent from the client can be checked before truly being implemented if this is a real concern.

After that almost everything is handled on the server-side. When the client wishes to do something, the server generally runs the actual logic and then sends the data to the client using a Mirror [ClientRpc] attribute. Many of the major mechanic handling scripts then only run ifServer and handle the information coming in to determine what events will actually occur.

List of Client-Side Authorization

  • Player Movement

List of Server-Side Authorization

  • Bullet Spawn
  • Bullet Transform
  • Enemy Spawn
  • Enemy Transform

Transitioning from a Local Project to a Network Project

Removing Duplicated Logic

One of the common issues they ran into in the tutorial while transitioning from a basic local project to a network project using Mirror was that in their efforts to have the server handle most logic, sometimes they would accidentally have the server as well as the client running the same logic. This produced weird results in various cases, from stuttering enemy movement to strange projectile effects. This would happen when adding to functionality of only running something server-side, but then forgetting to remove the logic from occurring just locally. This could cause instances of the same logic running twice effectively.

Basics of Testing Networking in Unity with Mirror

As this can lead to many bugs and errors, testing is critical when dealing with networking elements. There are several ways to go about this, but one of the simplest and what they use in the tutorial is building the project, then using that build as one network user (Client/Host) and the Unity Editor as the other (Host/Client). Mirror allows for a quick GUI implementation providing a Host button and Client button to connect to said Host using an IP address. “LocalHost” can be used in place of the IP address when doing the suggested testing, as this has the client look on its own computer for the game host.

Further details on the Network Manager HUD and using the base network connectivity can be found here on Mirror’s site:

Mirror – Network Manager HUD

Summary

This tutorial seems to show that Mirror is a decent option for quickly implementing an online network multiplayer solution for your simpler Unity projects. This simplified approach to setting up a network project also seems like good practice for getting your feet wet with dealing with networking implementation into Unity projects in general. It still requires client-side and server-side differentiation and managing what data is handled where and passing data between the two, so this appears to me as good practice for understanding these concepts. It also does just appear to work rather easily, so if you just want to get some kind of online multiplayer working for your project this seems like a useable solution.

via Blogger http://stevelilleyschool.blogspot.com/2021/02/online-multiplayer-networking-solution.html

Planning and Designing 2D Character Controllers: Using Lucid Chart

January 28, 2021

Planning

2D Platformer Design


Lucidchart

Description:
Visualization tool for diagramming and flowcharting.


Overview

I want to begin designing the 2D platformer character controller creation tool, so I looked for diagramming and flowcharting tools and turned to Lucidchart. I have used it a couple times in the past, and thought it would be a good source to go to again for this. It covers both the helpful programming diagramming as well as just general note and design organization is a clean and visual way.

Design Start: Inspirations and Controller Component Breakdown

Since I want to make a strong character controller creating tool, I want to gather good resources to draw from to see what different components I want to include in the tool. To start this, I began laying out all the basic components that I think can make up a 2D platforming character in a game that I am interested in covering. To support this, I have also began listing games with strong or unique 2D platforming character controllers that I want to draw options and information from. This are shown below in the images created with Ludicchart (these are just the beginnings to start getting the information down and figure out how to start organization).

2D Platformer Character Controller Components: Start


Games to Research and Draw Inspiration

As I started to fill in the games, I noticed that some of them are distinctly different in what I consider pacing so I decided to separate those out for now. Recent Yoshi games and most Kirby games tend to be a bit easier on the difficulty side, especially compared to a lot of games on my list, which I think in turn makes them feel a bit lower paced. This may not be the most accurate term, as there are times a game such as Hollow Knight can be a bit slower paced, but I do not think it has anywhere near the feel that Yoshi and Kirby games has I am trying to convey.

Summary

So far Lucidchart has been fantastic just for visually organizing my thoughts and notes so far. The components are very cleanly organized because I can lay out the major component names, while attaching notes to those individual components to give a longer description as well as some game examples to explain them better.

via Blogger http://stevelilleyschool.blogspot.com/2021/01/planning-and-designing-2d-character.html

2D Platformer Follow Camera Tutorial by Press Start and my Chunk Camera Concept

January 26, 2021

Camera

2D Platformer Design


Title:
Mario Style Camera Follow Tutorial

By:
Press Start


Youtube – Tutorial

Description:
Camera tutorial that follows similar to Mario for 2D platformers.


Overview

I got to implementing this tutorial into my 2D platformer project, which let me observe some of the pros and cons of this approach the way they created it. They created a direct following camera, which used a threshold to determine if the player is some distance from the center of the camera, and if so, starts to follow them as they move. I also created my own camera controller variation which moves in more

Camera Controller: Follow Camera (by Press Start)

This is the camera controller created in the tutorial linked above. The camera follows an object, generally the player, smoothly as they press against the borders of the camera threshold. The object must move some significant amount of distance before the camera moves. This keeps the camera from constantly moving, keeping more of the environment in a static frame longer.

There is an offset distance which is the distance from the edge of the camera that sets the bounds of the threshold box. When the follow object moves outside of this box, the camera begins to follow it. As long as the object continues to move out of the box, the camera will continue to keep following it.

Unity Orthographic Size

Orthographic Size: half the height in world units that the camera renders


The horizontal dimension rendered is solely determined by the screen ratio along with the height determined by orthographic size. Determining the size of a camera to fit objects vertically is very straightforward, as it is just half of the world units you would like to render. If you want to fit something horizontally however, you must include the screen ratio and use that as a multiplier (screen height / screen width) to convert the world width into an orthographic size value.

Issue: Stuttering

Originally the camera following gave a stuttering, glitchy effect while following the player at times, especially when jumping. I believe this is a result of changing the speed value set for the camera to match the player speed when it is large, since it uses the magnitude of the player’s velocity vector. This can change a lot very quickly, especially when jumping since this combines the x and y vector values of the player’s movement at that point.

Changing this speed check and set to solely the x-axis helped with consistency for most movement because most movement is horizontal. This however will most likely have a large impact if there is a lot of vertical movement since it will still be looking at the player’s velocity in the x to move the camera, regardless of their y velocity.

My Implementation of the FollowCamera Script with Modification

Alternate Camera Controller: Chunk Camera

Because of the stuttering effect I originally encountered, I tried making another type of camera controller that I thought may be a good option. I wanted to use a chunk movement approach where once the player reached the threshold of the current camera position, it would move the camera in that direction an entire chunk distance, centering the camera on the next location as opposed to directly moving with the player. The idea with this is that it keeps the camera movement more consistent, as well as showing the player much more of the next area they intend to move into more quickly.

I approached this by creating an IEnumerator named TransitionCamera that activates when the player hits a threshold. This begins a Lerp movement for the camera to the next designated chunk area, determined at Start based on the screen size and the threshold distance. A chunk distance is determined as: screen size – threshold distance. This centers the camera one full screen over, with an overlap from the previous screen equal to the threshold distance.

I also added a check to stop the coroutine if it was running and it was determined that it should start moving again to prevent weird whiplash effects if a player somehow was able to move back and forth between two screens very quickly. While mostly effective, this did have the negative resulting bug of slightly offsetting the camera completely over time because the TransitionCamera coroutine would be stopped prematurely and start moving to a new location solely determined by the current location +/- the chunk distance.

My Chunk Camera Variation

Summary

The original FollowCamera camera controller had more issues than I anticipated, so making it clean and consistent will take significantly more work. The jitteriness of the original implementation is unusable, but the modification at least makes it decent to use as a base for now as long as most movement is horizontal.

The chunk camera modification is at least cleaner already, although it still needs a bit of tweaking to make something that does not get slowly offset over time. This however probably only works for specific games and cannot be used for every 2D game case. Having both of these options is nice moving forward and is easy to switch between.

via Blogger http://stevelilleyschool.blogspot.com/2021/01/2d-platformer-follow-camera-tutorial-by.html

Unity Tilemap 2D Basics and Unity Learn Introduction

January 20, 2021

Tilemap 2D

Unity

Beginner Programming: Unity Game Dev Courses


Unity Learn Course – Introduction to Tilemaps – 2019.3


Description:
Basics of using Tilemaps for 2D projects in Unity.


Tilemap Basics

Grid

  • Only one in scene
  • Creates layout for scene that Tilemaps rely on
  • Cell Size: size of each square on Grid; applies to all Tilemaps within Grid
  • Cell Gap: space between each square on Grid; applies to all Tilemaps within Grid
  • Cell Layout: layout of tiles on grid; Options such as rectangle, hexagonal, isometric, isometric z as y
  • Cell Swizzle: direction Grid is facing; options such as XYZ, XZY, etc.

Tilemap

There can be multiple in a scene and it has two components: Tilemap and Tilemap Renderer.

Tilemap Component

Controls how the Tilemap behaves and how tiles within it work.

  • Controls how Tilemap behaves and how tiles within work
  • Animation Frame Rate: affects spped of animated tiles in Tilemap
  • Color: color and transparency
  • Tile Anchor: where tile is anchored to grid
  • Orientation: direction tiles are facing

Tilemap Renderer Component

Change how tiles are rendered and sorting order.

Modes

Chunk Mode

  • Sprites on Tilemap rendered in batches with each batch being treated as a single sort item in the 2D transparent queue
  • reduced draw calls for performance
  • other renderers cannot be layered or rendered in between part of the Tilemap
  • ideal for terrain base layer or other “single depth” maps


Individual Mode

  • sprites sorted based on position in Tilemap and Sort Order
  • render to allow interweaving of sprites
  • good for allowing sprites to pass behind other sprites
Other Parameters
  • Detect Chunk Culling: detect chunk bounds automatically or set them manually
  • Chunk Culling Bounds: extension of bounds for culling in Chunk Mode
  • Mask Interaction: can make Tilemap visible only inside or outside a Sprite Mask
  • Material: change material used to render each tile
  • Sorting Layer: Layer defining Sprites’ overlay priority during rendering
  • Order in Layer: helps determine which Layer is rendered first

Tilemap Collider 2D

This is an additional component of the Tilemap object (with Tilemap Renderer). This makes the entire Tilemap have colliders. Having many individual tile colliders can cause objects or players to get caught on the seams, so the tile colliders can be combined using composites. This can be done on the Tilemap Collider 2D, just toggle on “Used By Composite” and add the components: Composite Collider 2D, and Rigidbody 2D.

The following image shows my use of these tile map basics using Unity assets from a separate Brackeys tutorial. I experimented with adding flipped and rotated versions of some of the existing sprites to the tilemap and using the automatic colliders of the tiles. I had issues with the separate tile colliders because they would catch the player moving along the floor, so this image shows the composite collider solution to fix the colliders. This solved that issue and cleaned up the colliders.


Basic Use of Tilemap and Colliders

Keyboard Shortcuts: Rotate and Flip

Flip Sprite: { “Shift + [“

Rotate Sprite: [

Summary

Tilemaps are actually extremely easy to use and seem to give pretty effective results. I did have the issue with the individual colliders immediately after using the automatic colliders, but it appeared to be resolved with the composite colliders, which combine the colliders into large contiguous colliders. The difference between selecting, moving, and brushing tiles can be weird sometimes, but I was able to get the hang of it eventually and the process became fairly smooth after a while. Finding the keyboard shortcuts for rotating and flipping was also a bit strange, but was very useful once I found it.

via Blogger http://stevelilleyschool.blogspot.com/2021/01/unity-tilemap-2d-basics-and-unity-learn.html

Jump Physics and Controller for 2D Platformer Tutorial by Press Start

January 19, 2021

Player Controller

2D Platformer Design


Title:
A Perfect Jump in Unity – A Complete Guide

By:
Press Start


Youtube – Tutorial

Description:
More involved tutorial for jump controls for 2D platformer.


Overview

This tutorial goes more in depth on the jump control and mechanics for 2D platformers. This starts to involve logic for varied jump heights when holding the jump button as well as ensuring the proper number of jumps (generally a single jump, but can help lead to double jump or multi-jumps). This tutorial also involves some simple animations through script to help add life to the jump mechanic, such as squeezing during the jump.

via Blogger http://stevelilleyschool.blogspot.com/2021/01/jump-physics-and-controller-for-2d.html

2D Platformer Mario Style Camera Follow Tutorial by Press Start

January 14, 2021

Camera

2D Platformer Design


Title:
Mario Style Camera Follow Tutorial

By:
Press Start


Youtube – Tutorial

Description:
Camera tutorial that follows similar to Mario for 2D platformers.


Overview

I want to get back to working with 2D platforming programming and came across this useful tutorial for creating a decent camera controller. Tutorials like this are always nice as the camera is a very critical element of the overall feel of a 2D platformer, but it isn’t something I necessarily want to focus my time on for now, so this gives me a good starting point that I can quickly implement and tweak for my needs starting out. If it becomes more critical later in the process, I can come back to it with other methods.

via Blogger http://stevelilleyschool.blogspot.com/2021/01/2d-platformer-mario-style-camera-follow.html

Unity UI Design – Video on Color Palettes, Layout Components, and Blur Panel

January 13, 2021

Unity

UI Design


Title:
Making UI That Looks Good In Unity using Color Palettes, Layout Components and a Blur Panel

By:
Game Dev Guide


Youtube – Tutorial & Information

Description:
Making better looking UI, specifically through Unity.


Overview

As I close in on another end point for the Architecture AI project I am working on, I am tweaking the UI elements again. This motivated me to look a bit more into UI design again, and this video looks like a nice quick pickup to provide some significant improvements to my usual UI options. This will also cover making it look a bit nicer, which is a good compliment since I have generally focused on just getting UI elements to work well previously.

via Blogger http://stevelilleyschool.blogspot.com/2021/01/unity-ui-design-video-on-color-palettes.html

Architecture AI Pathing Project: Upward Raycast for Better Opening Detection

January 11, 2021

Raycast for A* Nodes

Architecture AI Project


Original Downward Raycast and Downfalls

The raycasting system for detecting the environment to setup the base A* pathing nodes was originally using downward raycasts. These rays traveled until they hit the environment, and then set the position of the node as well as whether it is walkable or not. An extra sphere collision check around the point of contact was also conducted so as to check for obstacles right next to the node as well.

This works for rather open environments, but this had a major downside for our particular needs as it failed to detect openings with in walls and primarily doors. Doors are almost always found within a wall, so the raycast system would hit the wall above the door and read as unwalkable. This would leave most doors as unwalkable areas because of the walls above and around them.

Upward Raycast System Approach

Method

The idea of using an upward raycast was that it would help alleviate this issue of making openings within walls unwalkable when they should be walkable. By firing the rays upward, the first object hit in most cases can safely be assumed to be the floor because our system only works with a single level at this time. Upon hitting the first walkable target (in this case, the assumed floor), this point is set and another raycast is fired upward until it hits an unwalkable target. If no target is hit, this is determined as walkable (as there is clearly nothing unwalkable blocking the way), but if a target is hit, the distance between these two contact points is calculated. This distance is then compared with a constant height check and if the distance is greater, the node is still marked as walkable even though it eventually hit an unwalkable object.

This approach attempts to measure the available space between the floor and any unwalkable objects above it. If a wall is set directly onto the floor, as many are, the distance will be very small so it will not meet the conditions and will be set unwalkable appropriately. If there is a walkable door or just a large opening such as an arch, the distance between the floor and the wall above the door or the example arch way should be large enough that the system notes this area is still walkable.

Sphere Collision Check for Obstacles

Similarly to the original system, we still wanted a sphere collision check to help note obstacles very close to nodes so that the obstacles would not slip between the cracks of the rays cast, effectively becoming walkable. We included this similarly, but it is noted because the initial hit used is now below the floor, so the thickness of the floor must be accounted for. Currently a larger radius check is just needed so it can reach above and through the floor. In future edits, it could make sense to have a noted constant floor thickness and perform the sphere radius check above the initial raycast contact point according to this thickness.

Test Results

Details

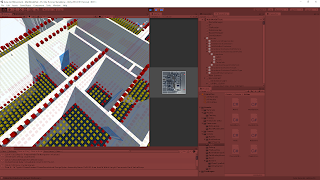
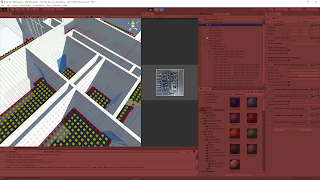
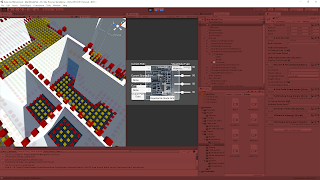
I compared the two raycast methods with a few areas in our current test project. In the following images, the nodes are visualized with Unity’s cube gizmos. The yellow nodes are “walkable” and the red nodes are “unwalkable”. Most of the large white objects are walls, and the highlighted light blue material objects are the doors being observed.

Test 1

A high density door area was chosen to observe the node results of both systems.

The downward check can work for doors when the ray does not directly hit a wall, as the sphere check properly checks them as walkable from the floor. However, the rays hitting the walls can be seen by the unwalkable nodes placed on top of them. A clear barrier is formed along the entirety of the walls, effectively making the doors unwalkable.

The upwards raycast test clearly shows every door has at least a single node width gap of walkable nodes in every case. The doors that were originally unwalkable with the downward raycast and now walkable as the height check was met.

Test 1: Downward Raycast


Test 1: Upward Raycast

Test 2

A larger room with a single noteable door was observed.

The downward check does pose a problem here as a full line of unwalkable nodes can be seen on the floor blocking access through the door and into the room. Because the problem is seen with nodes on the floor rather than nodes on top of the wall, this is actually a case where the sphere collision check is the problem and not the raycast particularly. Changing the collision radius for the check could potentially solve the issue here.

The upwards raycast is able to cleanly present a walkable path through this door into the room. While this does give us the result we desired, it should be noted again this difference can be attributed to the difference in the sphere collision check for obstacles. The same radius was used for both tests, but the upwards raycast sphere orginates from the bottom of the floor, so the extra distance it has to travel through the floor is what really opens up this path.

Test 2: Downward Raycast


Test 2: Upward Raycast

Summary

The upwards raycast seems extremely promising in providing the results we wanted for openings, doors especially. The tests clearly demonstrate that it helps with a major issue case the downward check had, so it is at worst a significant upgrade to the original approach. The upward raycast with distance check method also succeeded in other door locations, supporting its consistency. It will still have trouble from time to time with very narrow openings, but should work in a majority of cases.

via Blogger http://stevelilleyschool.blogspot.com/2021/01/architecture-ai-pathing-project-upward.html

7 Steps for Starting Every Game Project – from Jason Weimann

December 21, 2020

Setup for Every Game Dev Project

Unity Setup


Title:
Do these 7 things for EVERY game!

By:
Jason Weimann


Youtube – Information

Description:
7 major steps to do for any non-minimal game development project, with a focus on Unity development.


Overview

This quick video is seven good steps to take when setting up a new game project assuming it is something you will be working on for any length of time. These tips range from general good practices that really should just be done on any project to helpful actions for keeping you organized and moving forward.

via Blogger http://stevelilleyschool.blogspot.com/2020/12/7-steps-for-starting-every-game-project.html

Architecture AI Pathing Project: Revit Data Applying Helper Class

December 9, 2020

File Reader

Architecture AI Project


Enhancing the Extendability of the Revit Parameter Data Application Class through Helper Class

I got the basics of reading in a specified set of parameter data from Revit to apply to the model in Unity, but we would need to have options for possibly using many sets of data from there. To handle this I wanted to make it easy to add ways to handle all the differents types of logic with these sets of data. This started by creating a foundational interface that any class utilizing the data would implement, but I also needed a way to tie these specific classes to their corresponding data sets. I ended up doing this mostly with a helper class, named RevitModelDataHandlerManager, to the CSVReaderRevitModel class.

Connecting Specific Data Handler Classes with Specific Data Sets Using a Dictionary

Because of the nature of this data, we know that we will be searching for several different specific strings somewhere along the way, so I wanted to hard code those strings in one global area so that if anything needs modified or added, I would only have to do it in one location and it would also reduce string input errors along the way. This was applied to the construction of a dictionary in the new helper class, named RevitModelDataHandlerManager.

RevitModelDataHandlerManager contains a hard coded initialized dictionary which associates a string term with a specific class implementing the IRevitModelDataHandler interface:

  • key = string of sheet name
  • value = class implementing IRevitModelDataHandler specifically tied to that type of sheet

This way once the name of the sheet of interest is known, it can be entered here as the key for its proper data set a single time. Then anytime that type of data is filtered through this system, it uses this dictionary to determine exactly which class implementing the IRevitModelDataHandler interface to use so it translates the data into the proper functions within the system.

RevitModelDataHandlerManager then has a method which takes as inputs the two necessary inputs for any IRevitModelDataHandler class (GameObject object being modified, string value used for modification) as well as another string input to determine which IRevitModelDataHandler to use from the dictionary (string name associated with particular IRevitModelDataHandler {generally a sheet name}). And again, all the sheet names from CSVReaderRevitModel can then be siphoned through this RevitModelDataHandlerManager class which will determine which IRevitModelDataHandler classes to use for which data using the constructed dictionary.

Summary

After applying all these modifications, testing the system was working well and providing similar results as before when the system was more rigid and only testing a single data set. Testing multiple data sets ran smoothly and operated as intended.

Right now the system specifically allows input for combinations of a sheet name and a single column name (the column being the data values it is looking for). It may make sense in the future to have a string array as the column name because it could be possible that the user would want to search for several types of data within the same sheet at a given time. This can technically be accomplished currently by passing in the same sheet name multiple times, and just associating a different column name with it each time, but this is not the most efficient process.

Next Step

The foundation of the Revit parameter data reading system is basically fully functional at this time, it is just a matter of determing the various IRevitModelDataHandler type classes to create to handle all of our needs for now. Fixing the raycasting system to handle obstacle detection is now the next major step to look towards.

via Blogger http://stevelilleyschool.blogspot.com/2020/12/architecture-ai-pathing-project-revit.html